

Data Storage
Storage overview
Section titled “Storage overview”How your data is stored in Neurodesk depends on where you are running it:
-
Local (Neurodesk App on your own machine): Storage is directly linked to your host computer through the
/neurodesktop-storagedirectory. Your data persists for as long as you keep it: nothing is automatically deleted. The amount of available space depends on your local disk setup. -
Play (Neurodesk App cloud-hosted): Each user is allocated a fixed amount of storage space. You can check how much of your allocation you are using from within the Play environment. Be aware that data on Play is deleted after 30 days of inactivity, so make sure to back up any important files using the cloud storage or data transfer methods described below.
-
HPC (high-performance computing): Storage depends entirely on your institution and how Neurodesk has been set up by your system administrators. Typically, Neurodesk will be configured to bind-mount your institution’s existing storage infrastructure (e.g. scratch, group, or project directories).
For all environments, we recommend keeping a copy of important data in an external location. The sections below describe several methods for transferring data in and out of Neurodesk.
Transferring files
Section titled “Transferring files”Drag and drop
Section titled “Drag and drop”Uploading files
You can drag-and-drop files into the browser window to get files into the Neurodesktop desktop. This will then start a file upload:
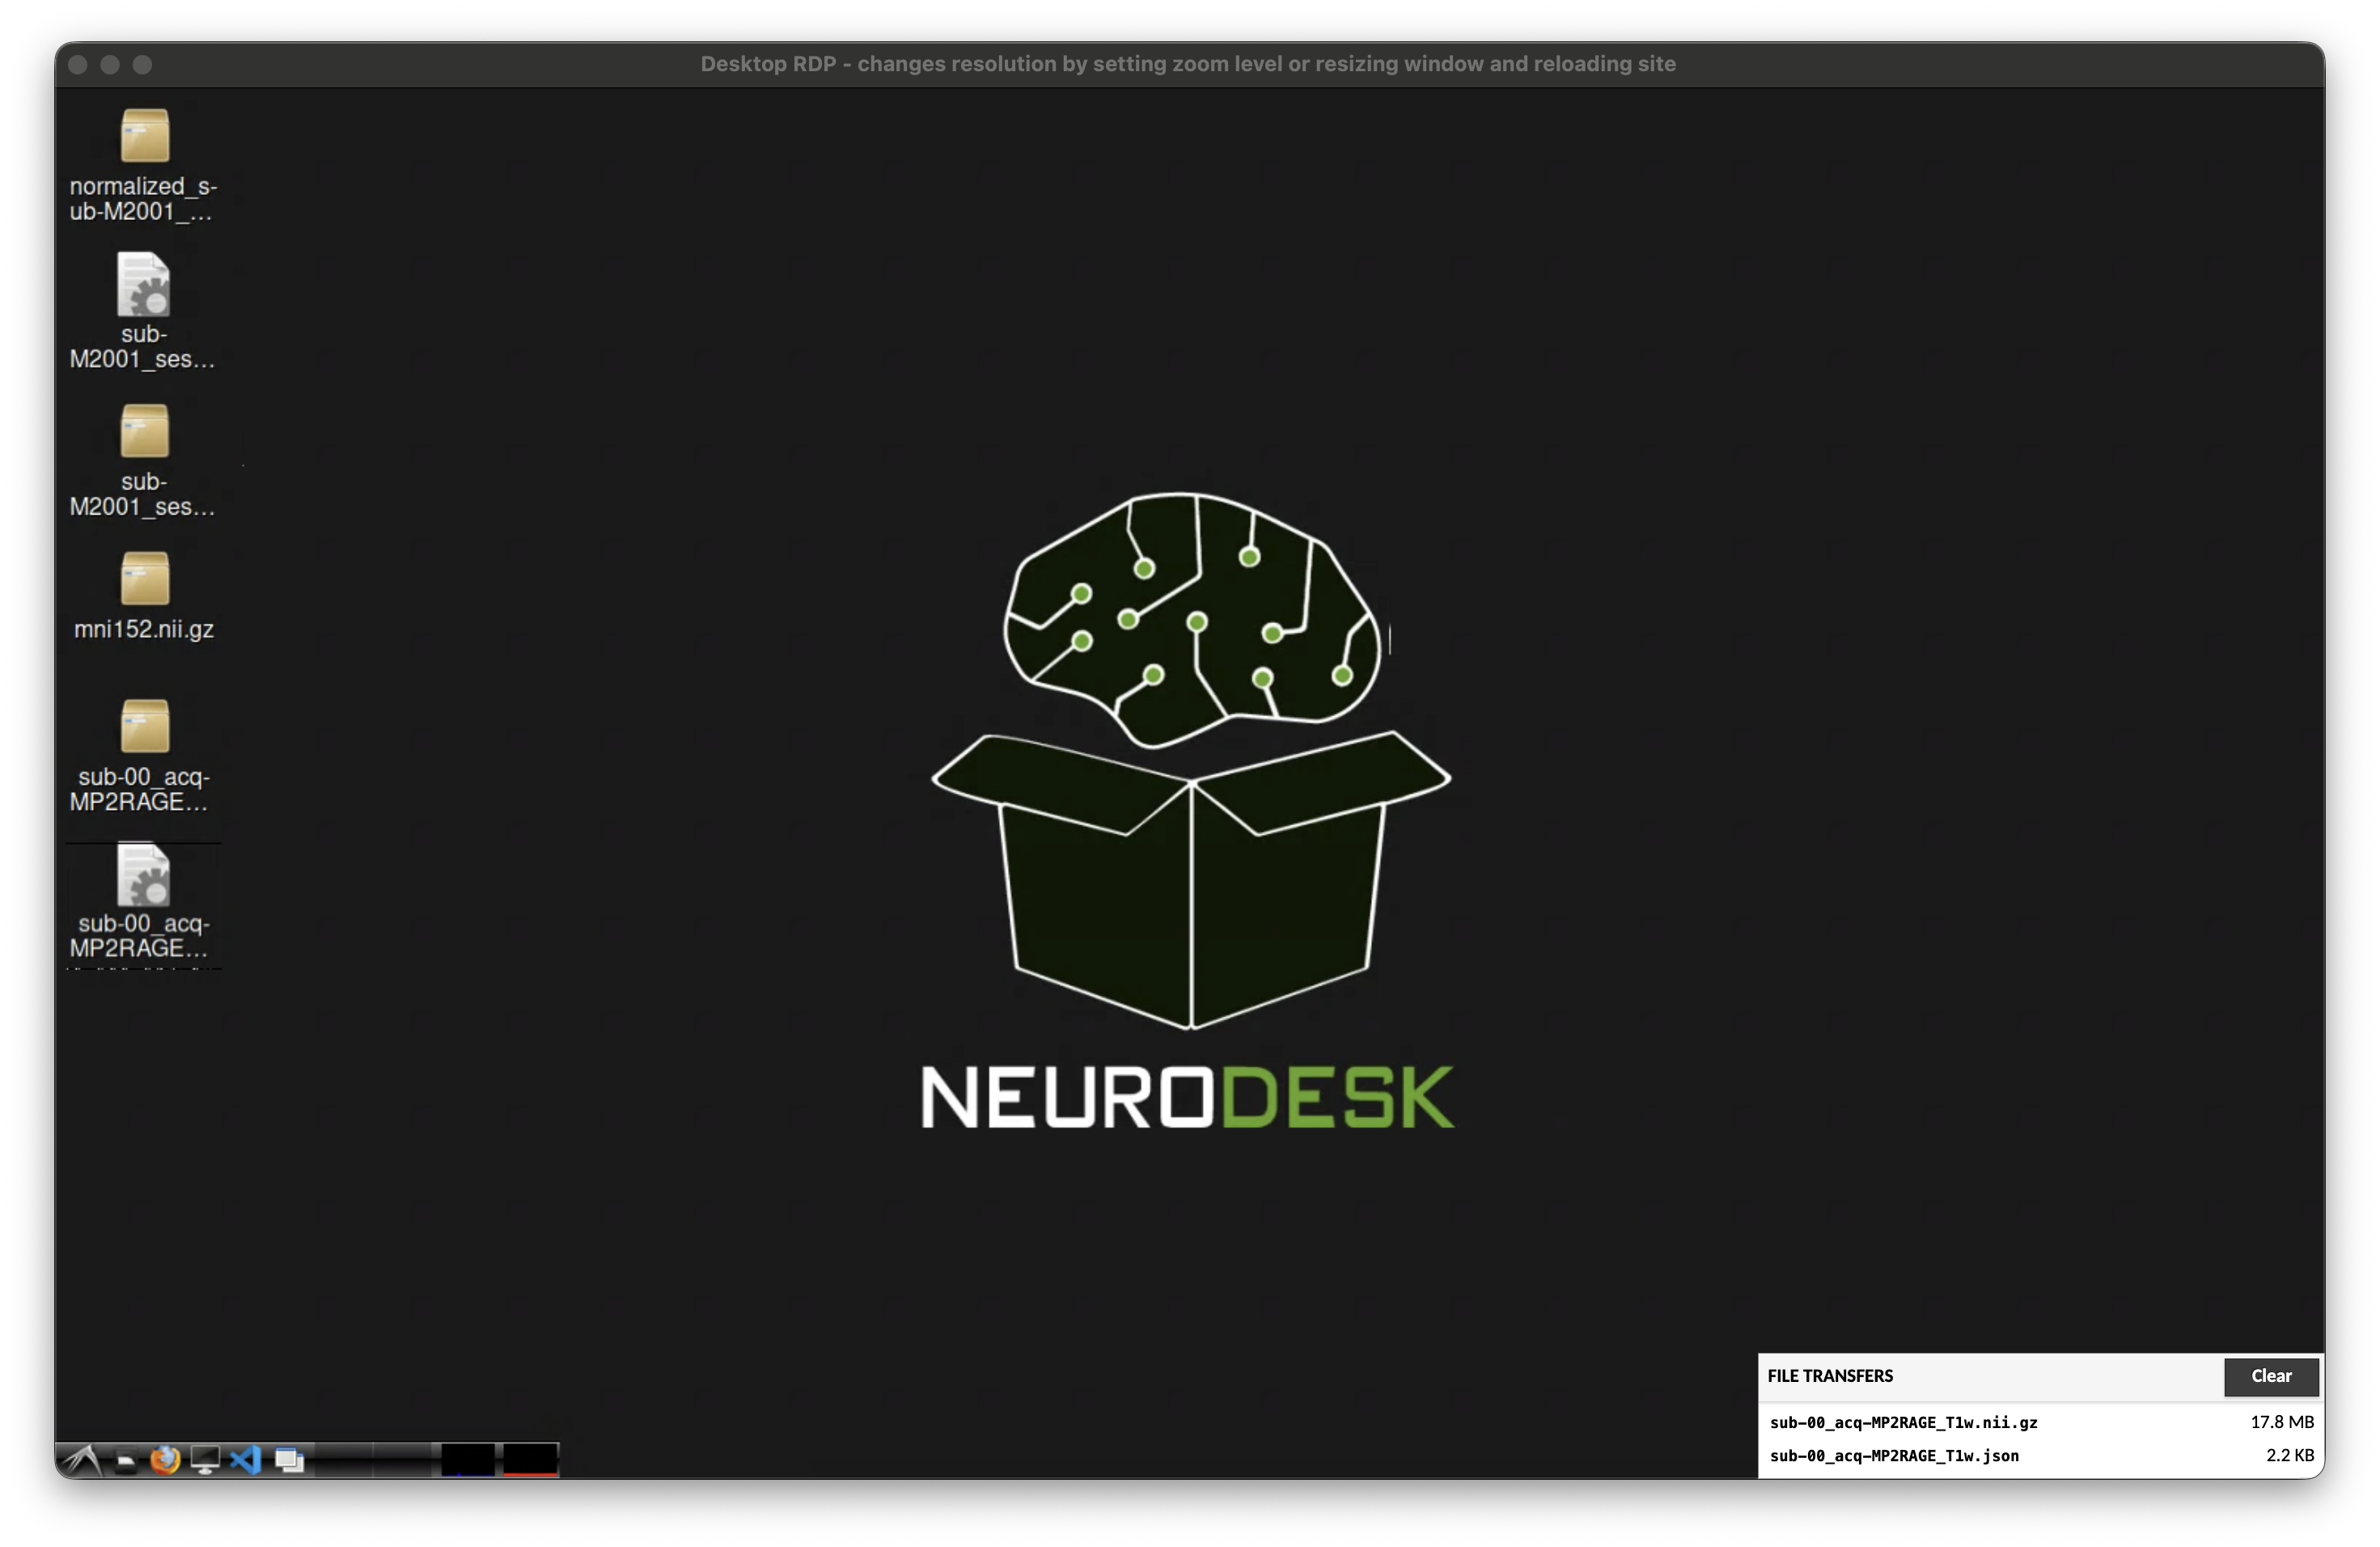
Downloading files
To download files from the desktop you will need to open the Guacamole settings by pressing Ctrl+Alt+Shift (Control+Command+Shift on Mac). This will open a menu on the side:
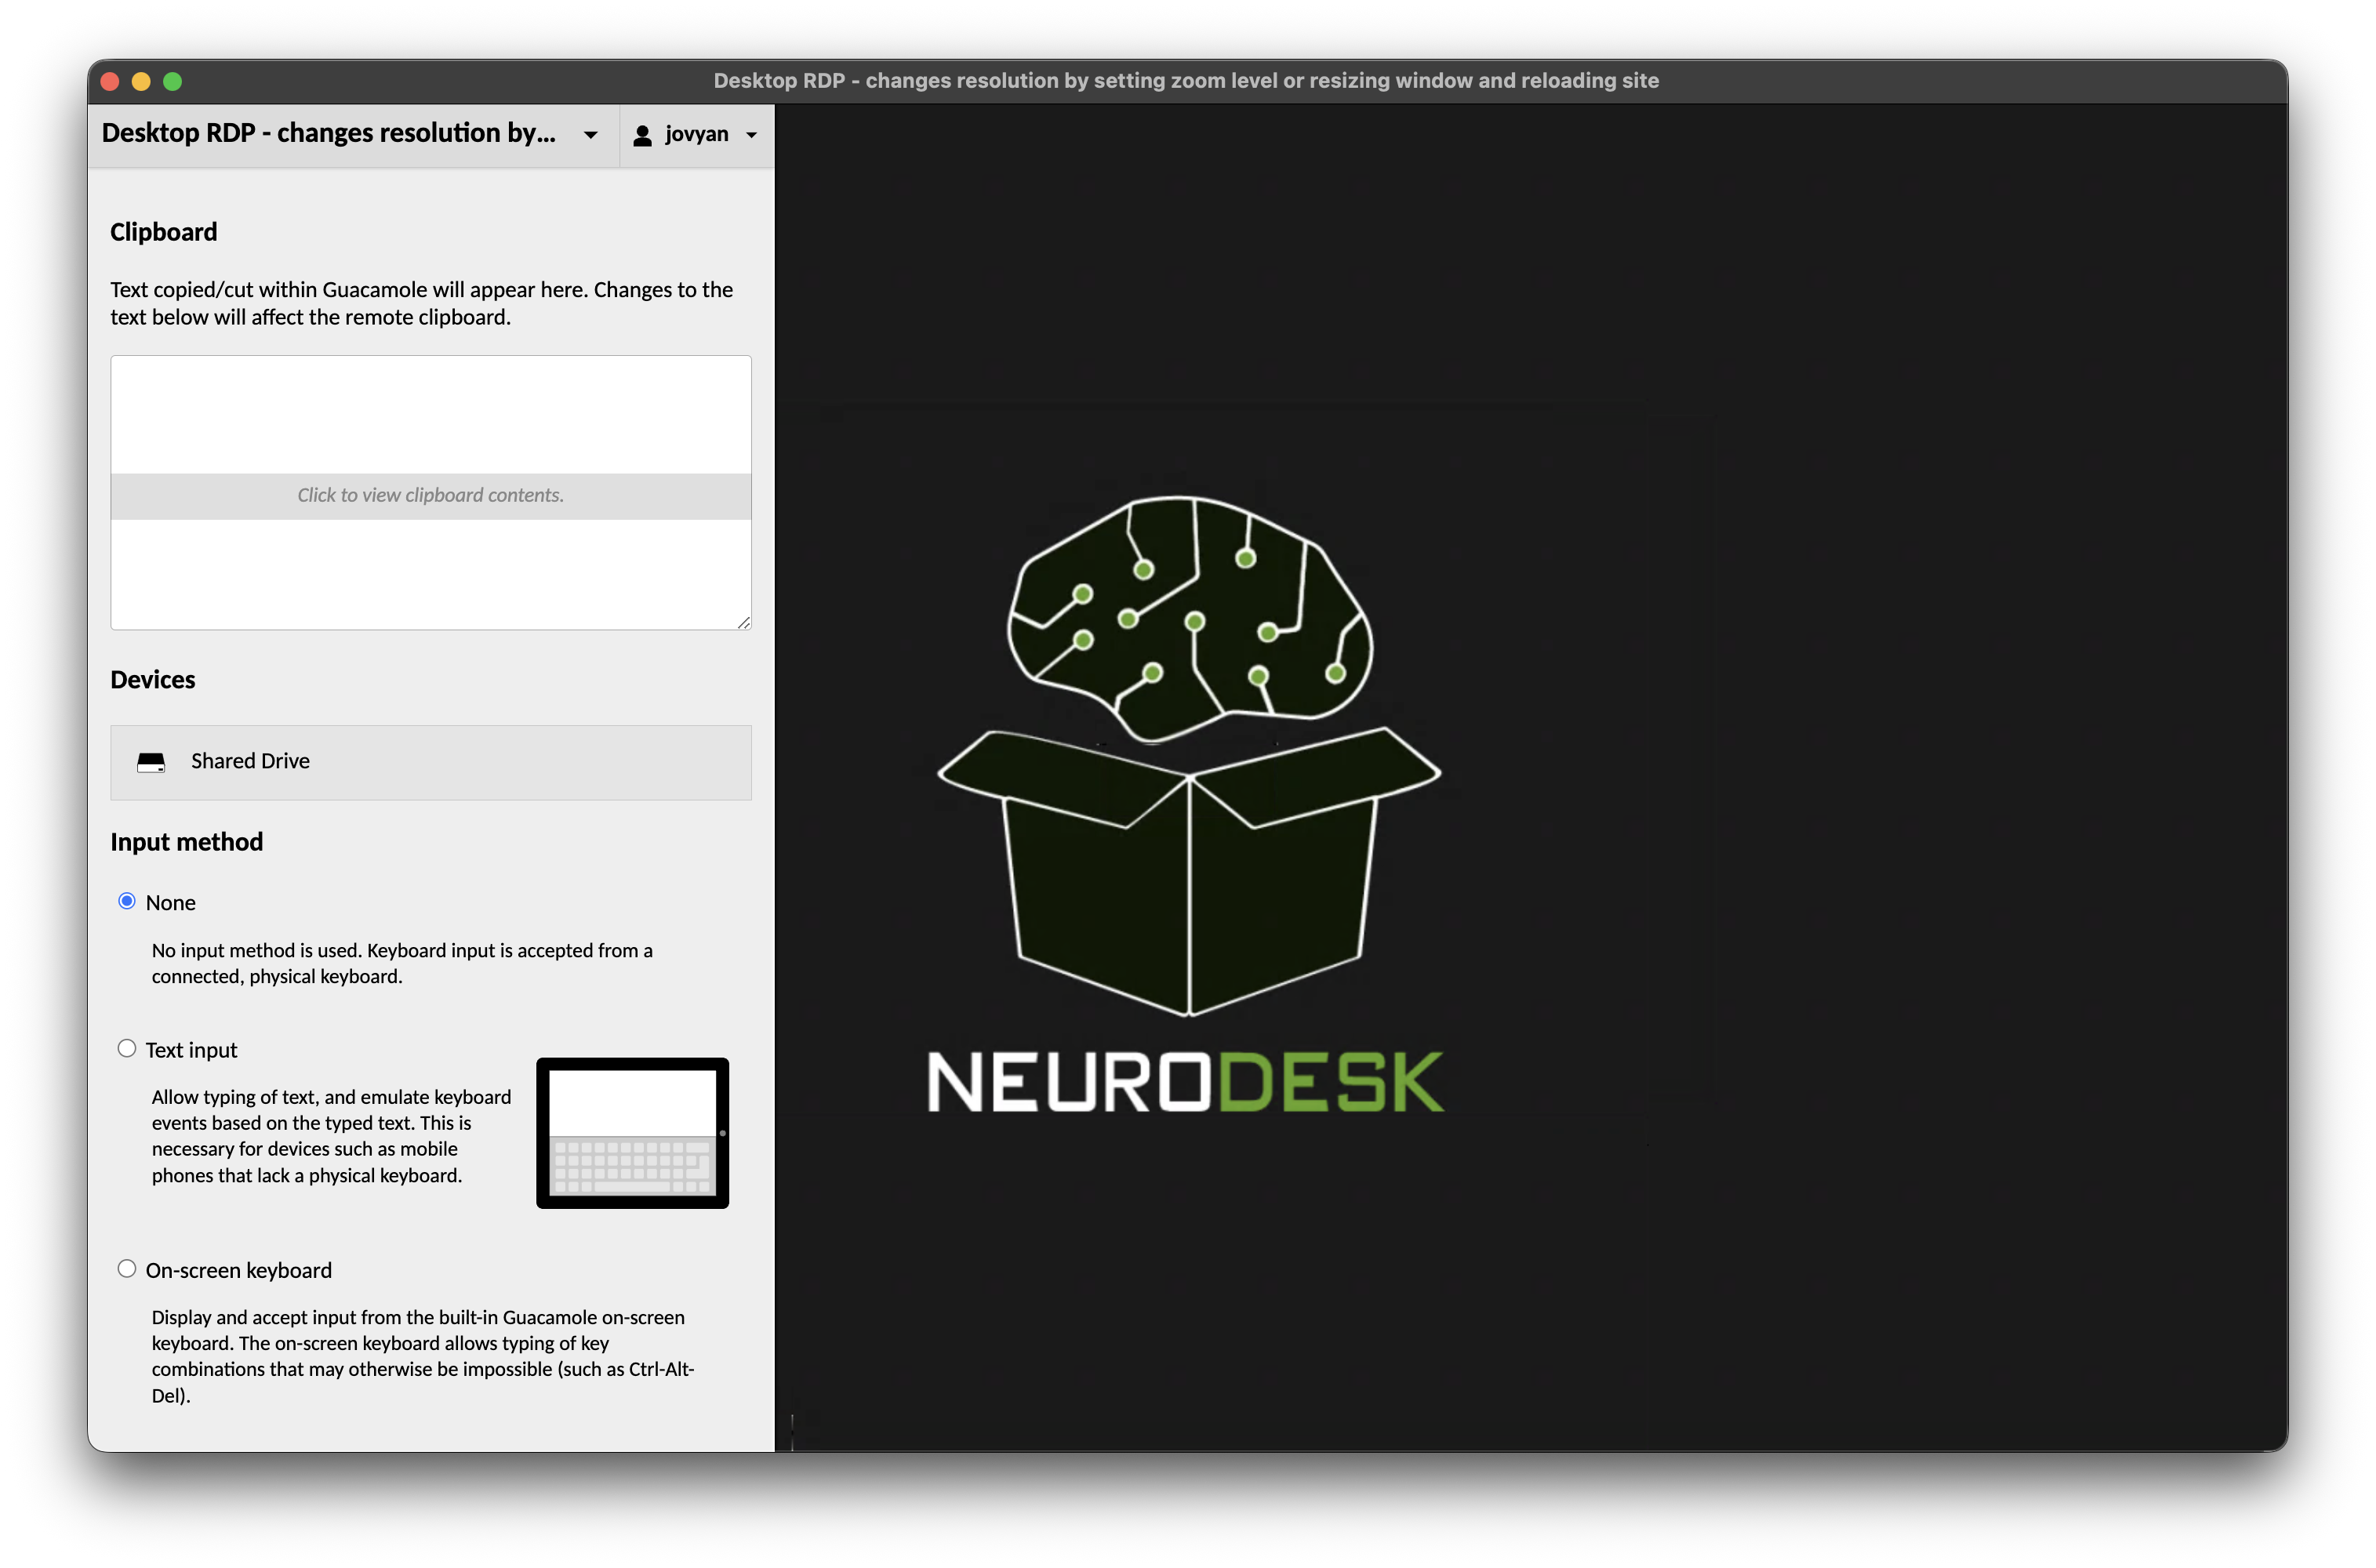
where you can click on “Shared Drive”:
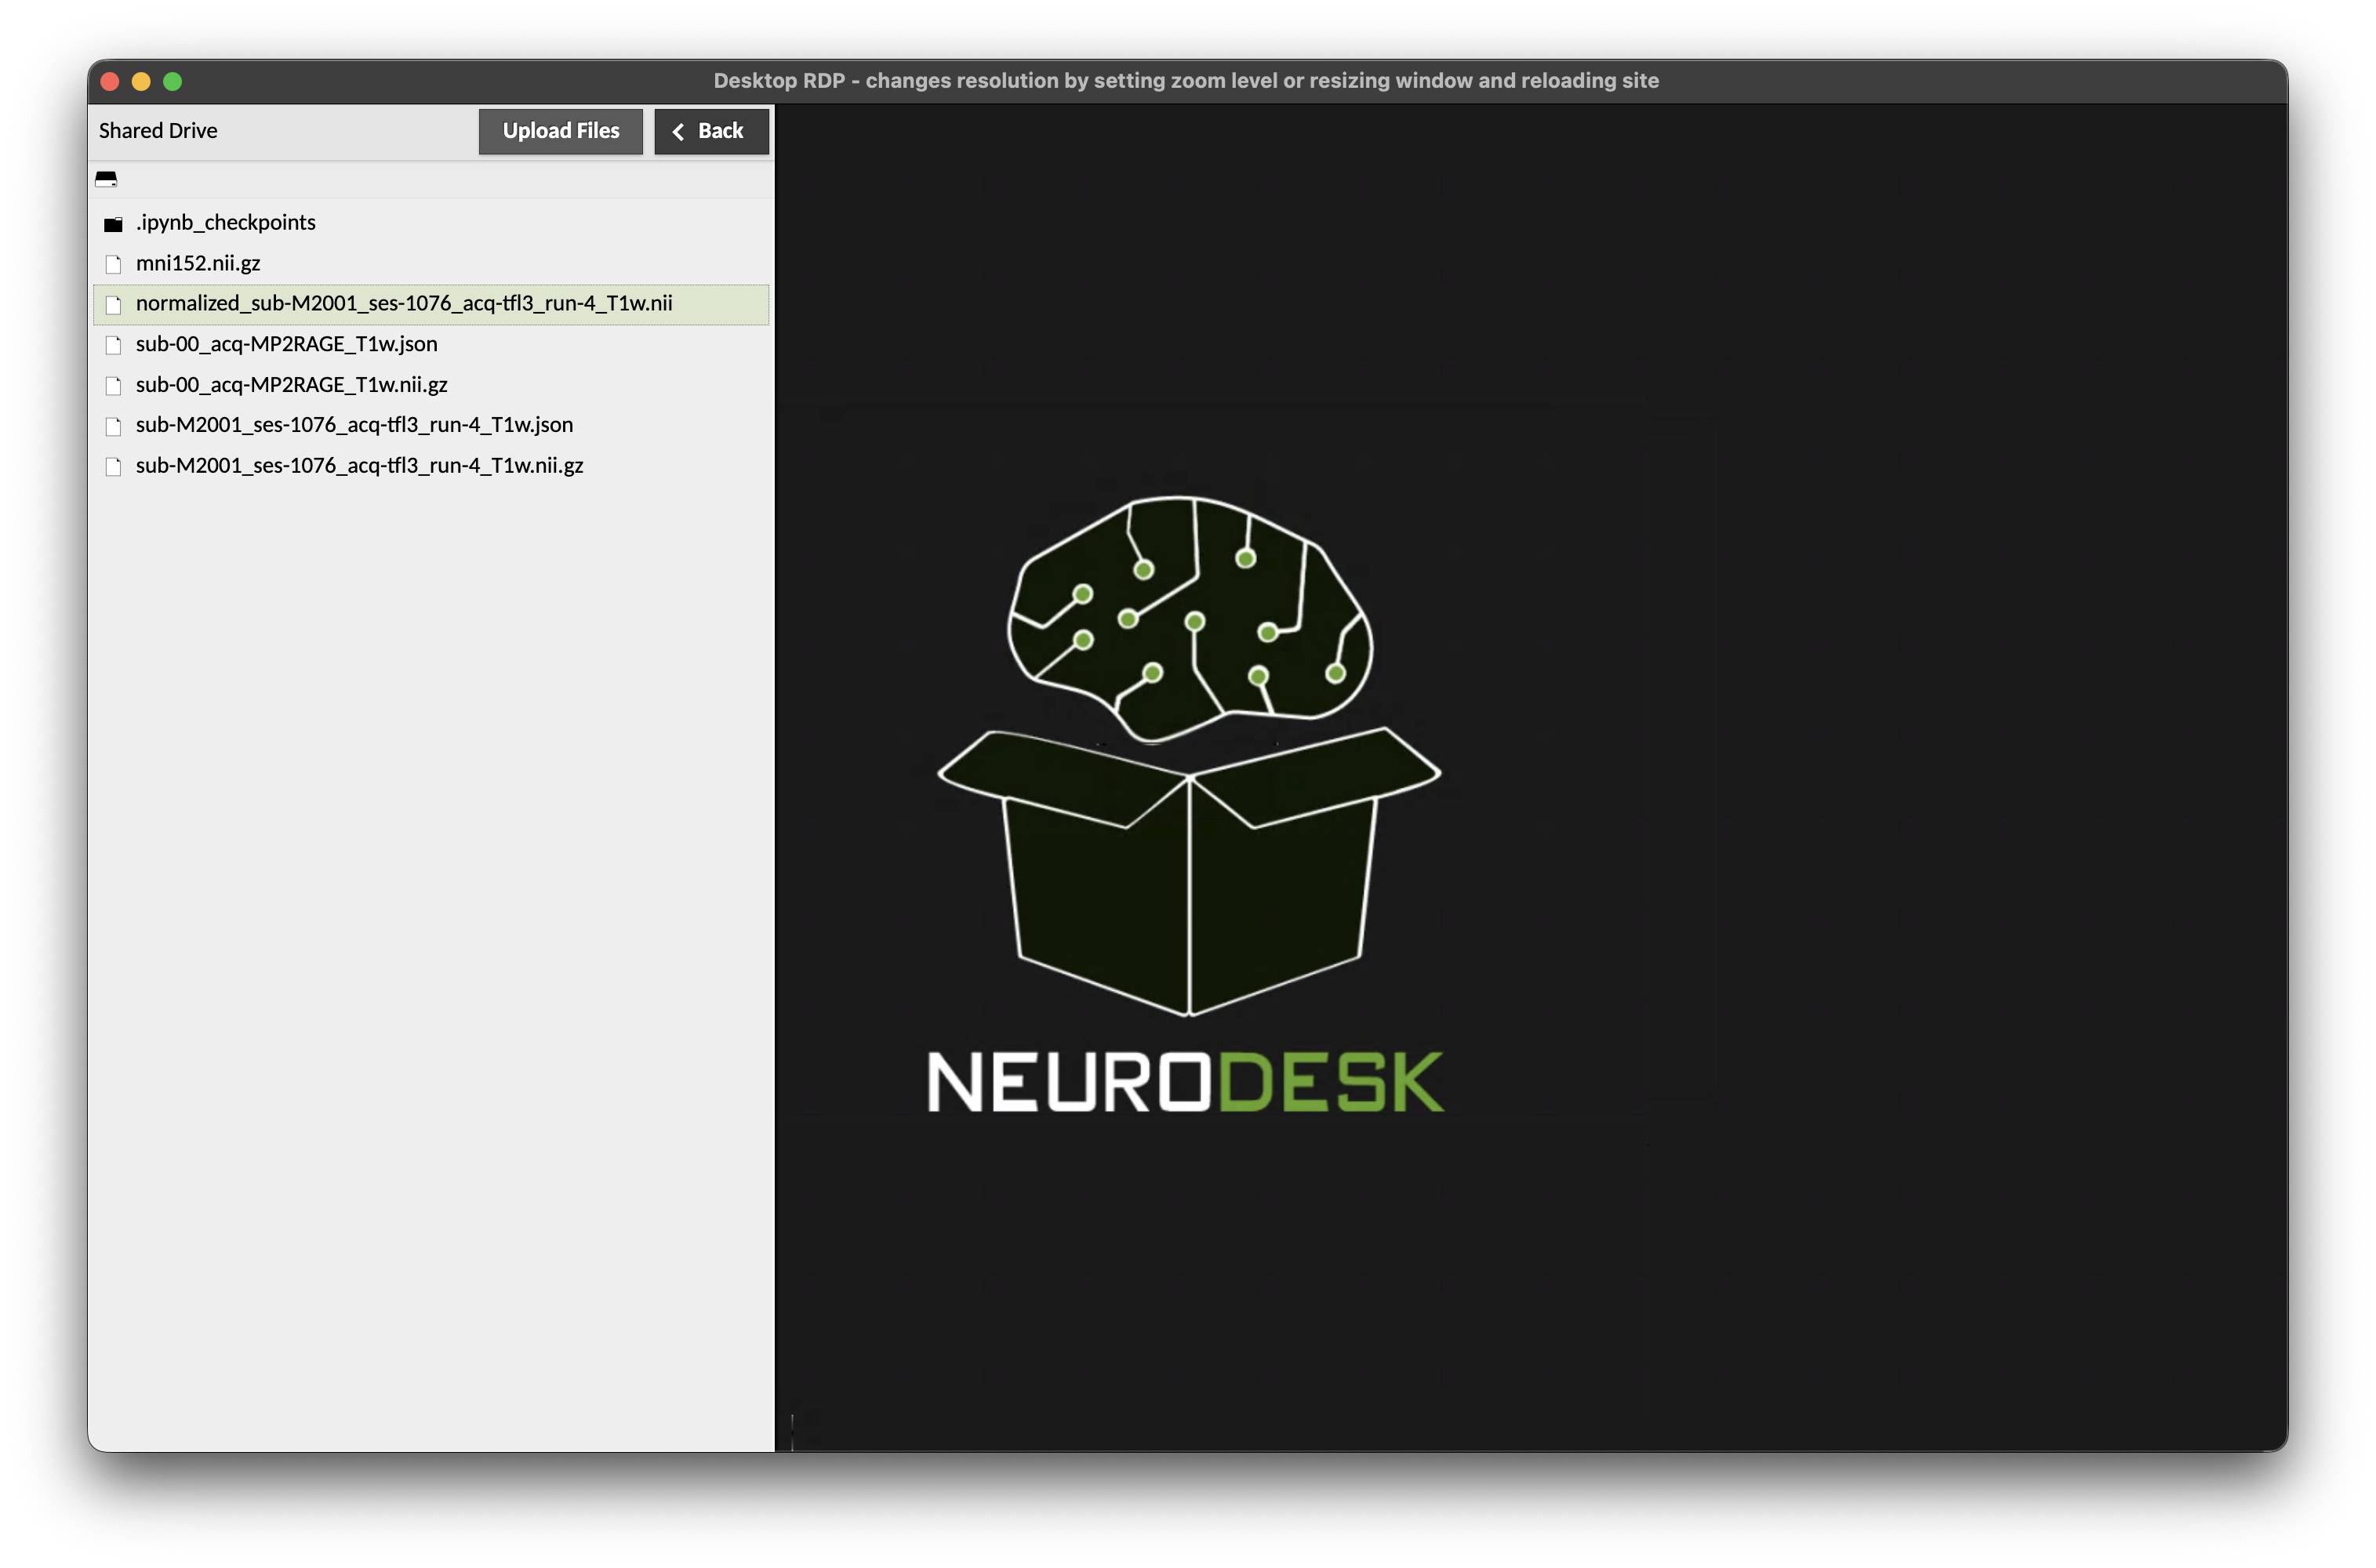
A click (or double click on Mac) on the file will start the download.
You can browse into folders in the shared drive by clicking (double clicking on Mac) on them. To get back to the base of the shared drive, press on the drive icon in the top left of the side menu (just below the “Shared Drive” title).
To close the side menu, press Ctrl+Alt+Shift once more (Control+Command+Shift on Mac).
Note that it is only possible to upload or download one file at a time through this interface. If you have multiple files in a directory we recommend zipping the directory and then transferring one zip archive:
zip files.zip files/Uploading files
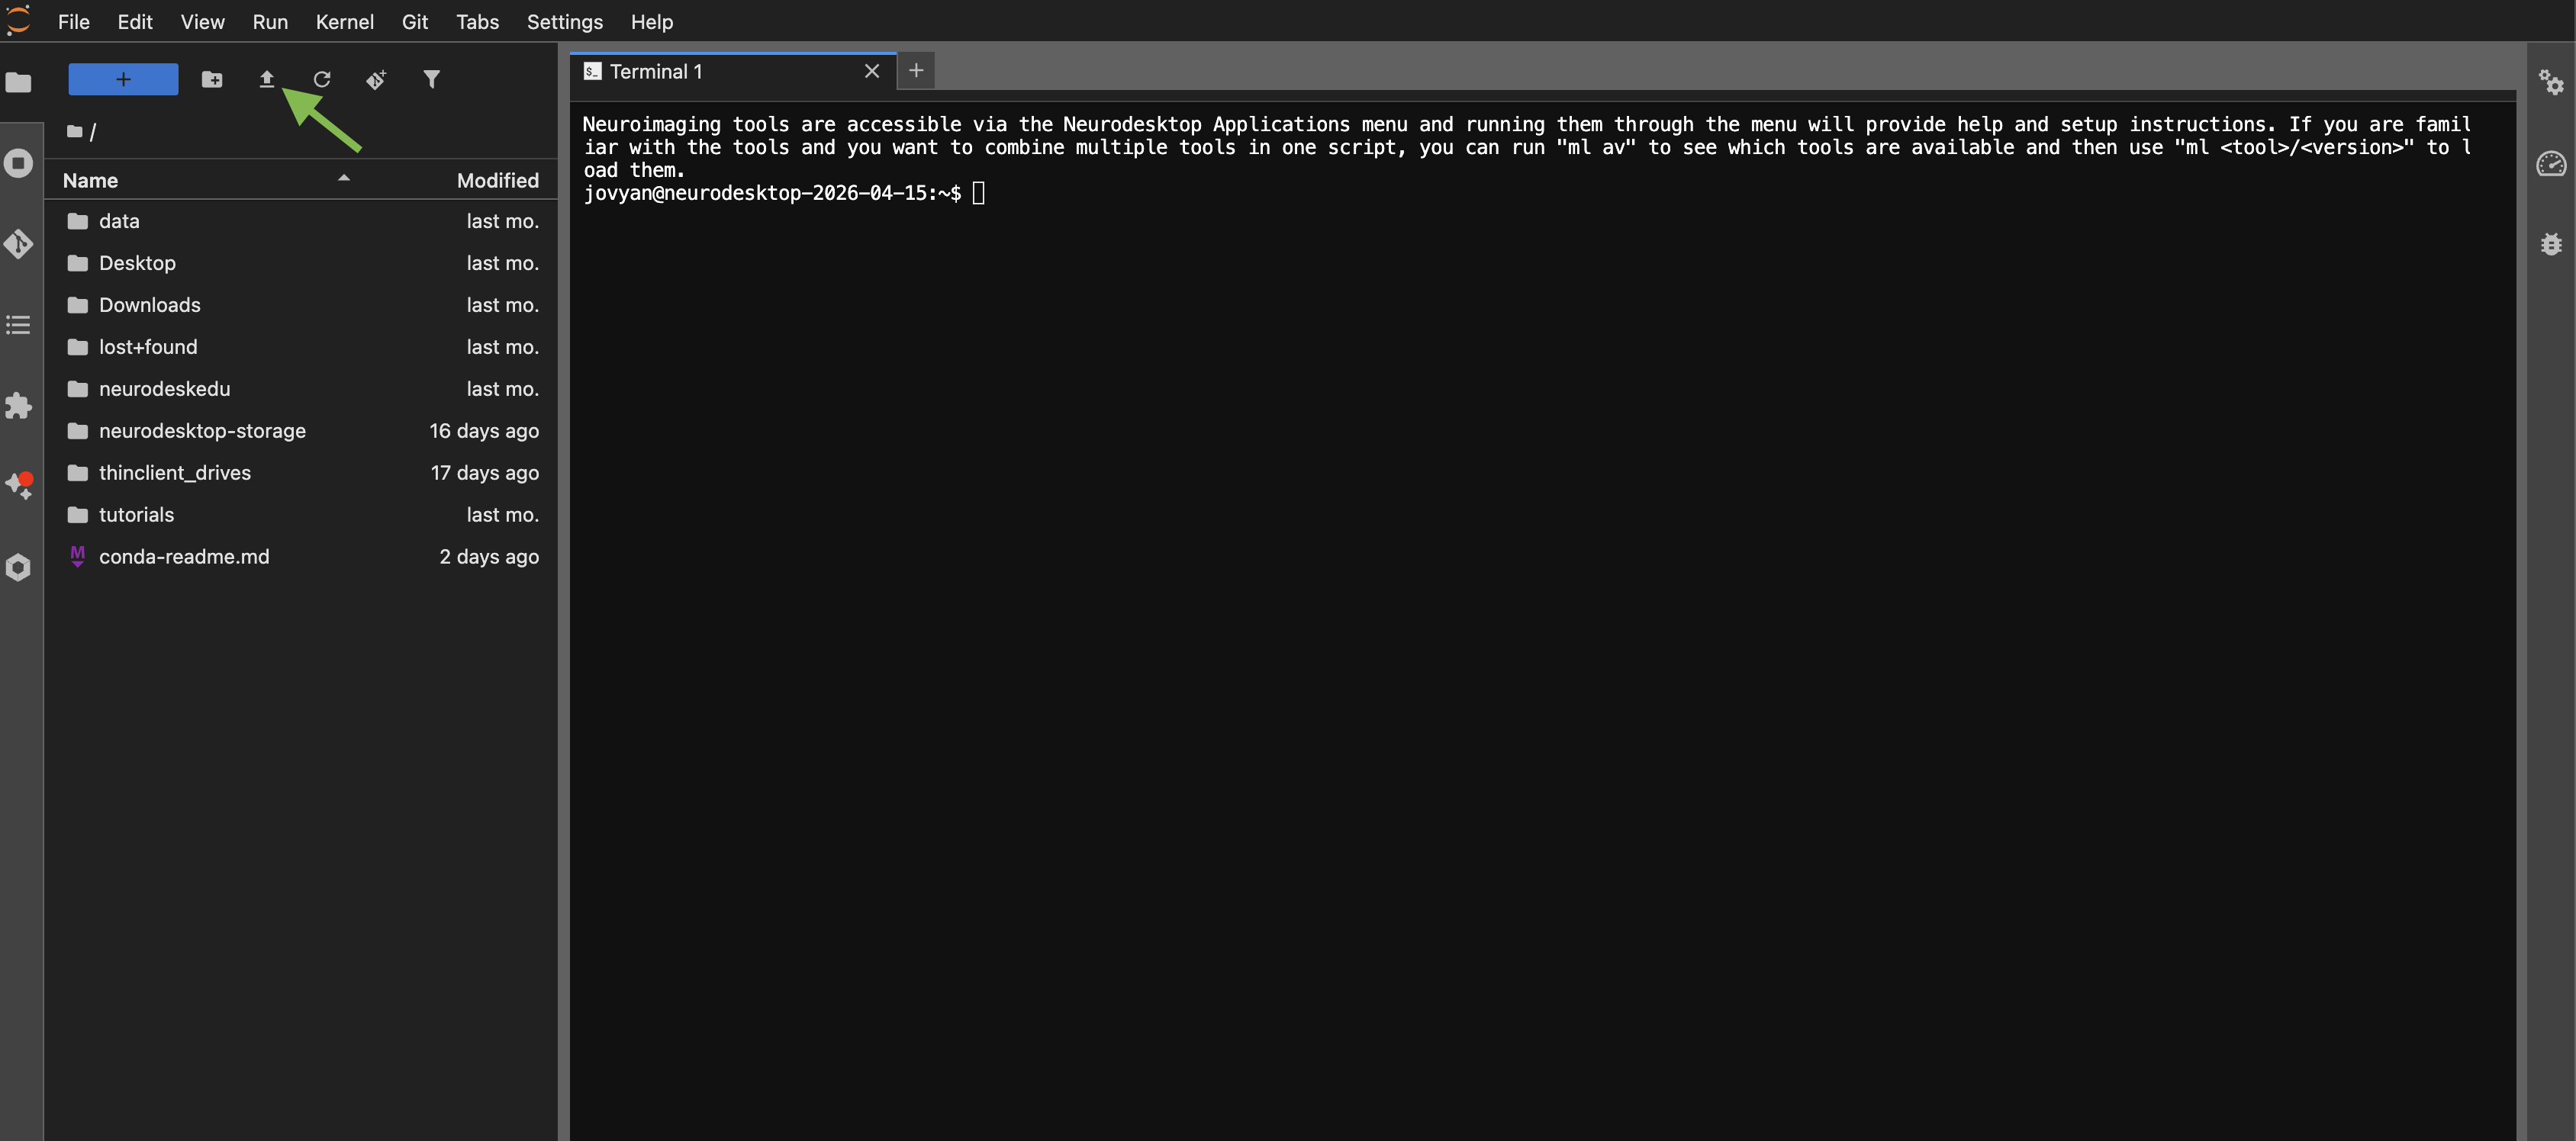
You can drag-and-drop files directly into the JupyterLab file browser panel on the left side. Alternatively, click the upload button (upward arrow icon) at the top of the file browser to select files from your computer.
Downloading files
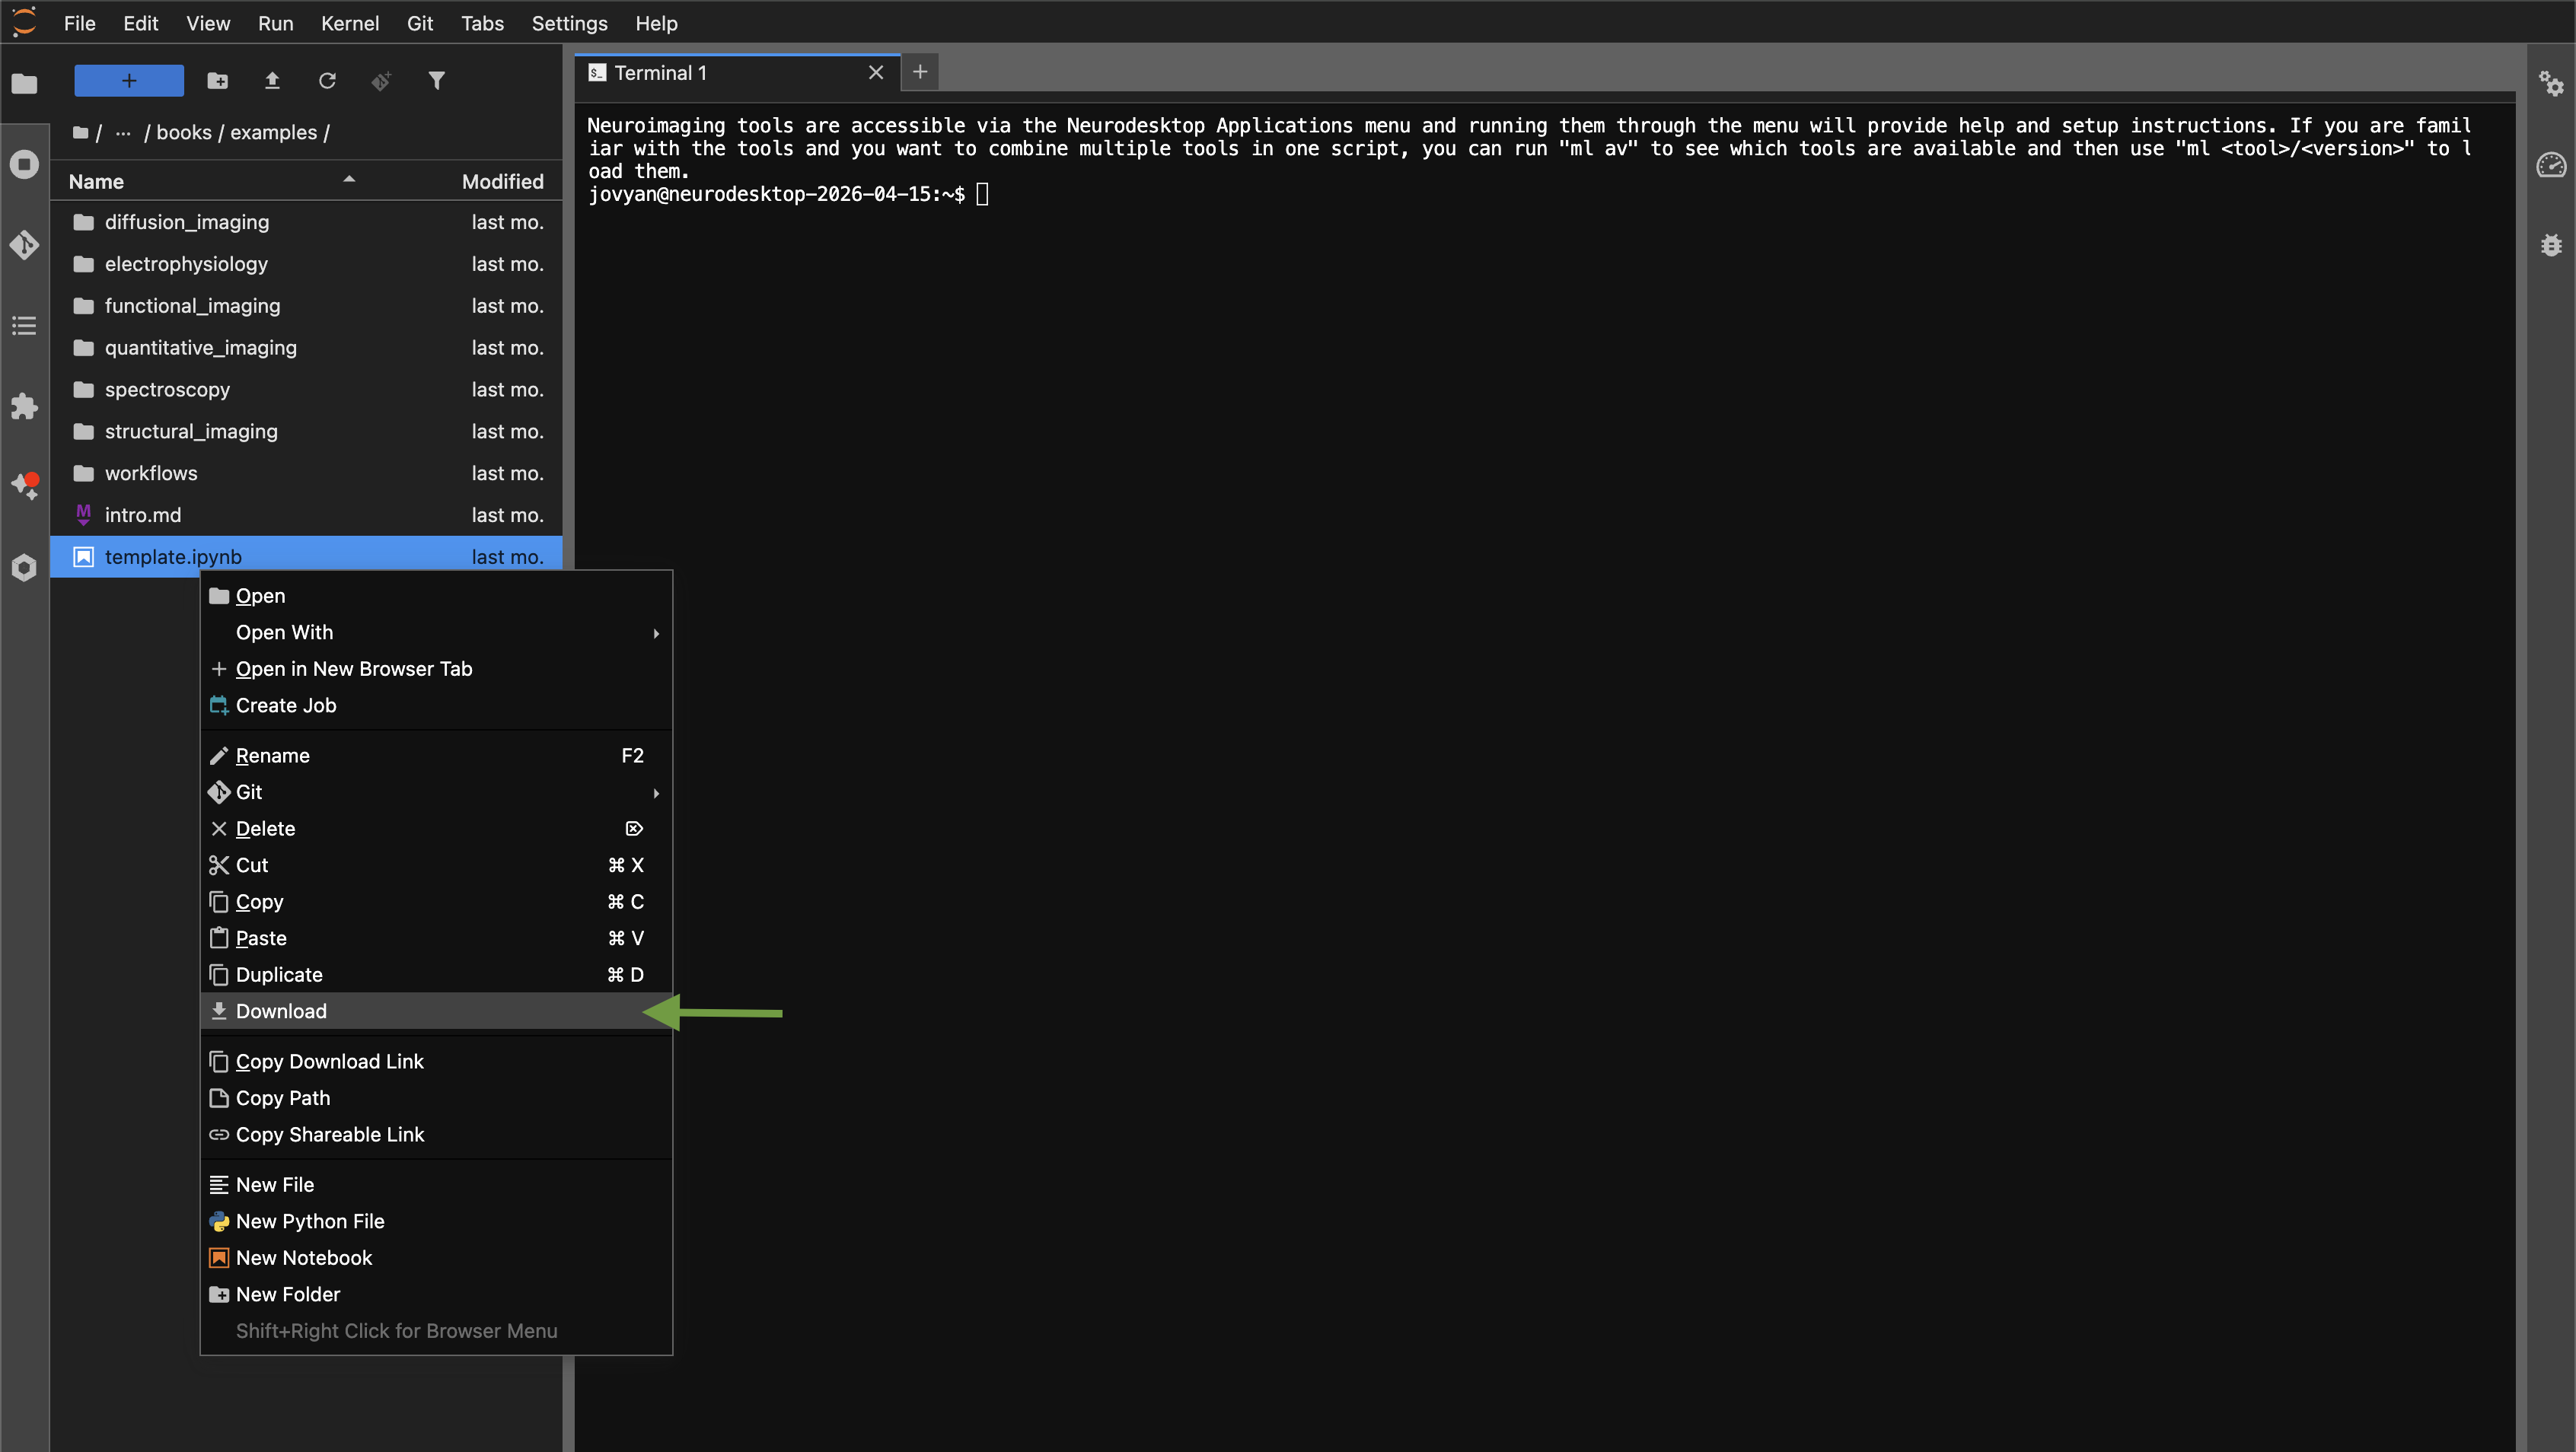
To download a file, right-click on it in the JupyterLab file browser and select “Download”.
Local storage
Section titled “Local storage”When running Neurodesktop locally, there are two storage locations to be aware of:
-
Home directory (
/home/jovyan): This is the Linux filesystem inside the Docker container. Files saved here will persist across container restarts (thanks to a Docker volume), but will be lost if you remove the container or its volumes. Think of this as your working space, not your safe storage. -
Neurodesktop storage (
/neurodesktop-storage): This is a direct link to a folder on your host computer. Files saved here live on your actual filesystem, outside of Docker. They will persist regardless of what happens to the container.
| Location | Path |
|---|---|
| Inside Neurodesk | /neurodesktop-storage |
| Host machine (macOS/Linux) | ~/neurodesktop-storage |
| Host machine (Windows) | C:/neurodesktop-storage |
Mounting external storage on your host computer
Section titled “Mounting external storage on your host computer”The -v C:/neurodesktop-storage:/neurodesktop-storage part of the docker command links the directory neurodesktop-storage on the C drive of your Windows computer to /neurodesktop-storage inside the desktop environment. Everything you store in there will be available inside the desktop and on the host computer.
You can also mount additional directories by adding another -v parameter set (e.g. -v D:/moredata:/data), which will mount the directory moredata from your D drive to /data inside Neurodesktop.
If you are using the Neurodesk App, you can set an additional storage location through the settings.
If you are starting Neurodesk through the command line, here is an example for Windows adding another storage directory:
docker run --shm-size=1gb -it --privileged --user=root --name neurodesktop -v C:/neurodesktop-storage:/neurodesktop-storage -v D:/moredata:/data -p 8888:8888 -e NEURODESKTOP_VERSION=2026-07-11 vnmd/neurodesktop:2026-07-11Cloud storage
Section titled “Cloud storage”Another way to get your data into Neurodesktop is to use a cloud storage provider like Dropbox, OneDrive, OwnCloud, Nextcloud or more general tools like Rclone or davfs2. Another good option is to use Globus for large amounts of data.
Nextcloud and OwnCloud desktop clients
Section titled “Nextcloud and OwnCloud desktop clients”Under the menu item “Accessories” you can find “Nextcloud” and “ownCloud” desktop sync clients that you can configure with your cloud service accounts.
Mounting WebDAV storage using davfs2
Section titled “Mounting WebDAV storage using davfs2”Another option is to directly mount WebDAV storage. Here is an example of how to mount OwnCloud storage into Neurodesktop:
sudo mount -t davfs https://yourOwnCloudInstance.com/plus/remote.php/webdav/ /data/It then asks you for a username and password, which you can generate in the settings: yourOwnCloudInstance/plus/settings/personal?sectionid=security.
Rclone
Section titled “Rclone”Rclone is a command-line tool that enables interaction with various cloud services. Here is an example of how to set up Rclone with an OwnCloud account:
- Start the configuration in a terminal window:
rclone config - Create a new remote:
n - Provide a name for the remote:
OwnCloud - For the “Storage” option choose:
webdav - As “url” set:
https://yourOwnCloudInstance.com/plus/remote.php/webdav/ - As “vendor” set OwnCloud:
2 - Set your OwnCloud username after generating an access token at
yourOwnCloudInstance/plus/settings/personal?sectionid=security - Choose to type in your own password:
y - Enter the password / token from the OwnCloud App passwords page and confirm it again
- Leave blank the bearer_token: press Enter
- No advanced config necessary: press Enter
- Accept the configuration: press Enter
- Quit the config:
q - Download data:
rclone copy --progress --transfers 8 OwnCloud:/raw-data-for-science-paper . - Upload data to OwnCloud:
rclone copy --progress --transfers 8 . OwnCloud:/data-processed
Globus
Section titled “Globus”We also provide the Globus client, so you can transfer large amounts of data between Globus collections and Neurodesktop.
Start the setup from a terminal in the Neurodesktop environment using RDP or VNC:
ml globusglobusconnectpersonal -setupThe terminal displays a login URL. Copy the URL, open it in a browser, and sign in to your Globus account.
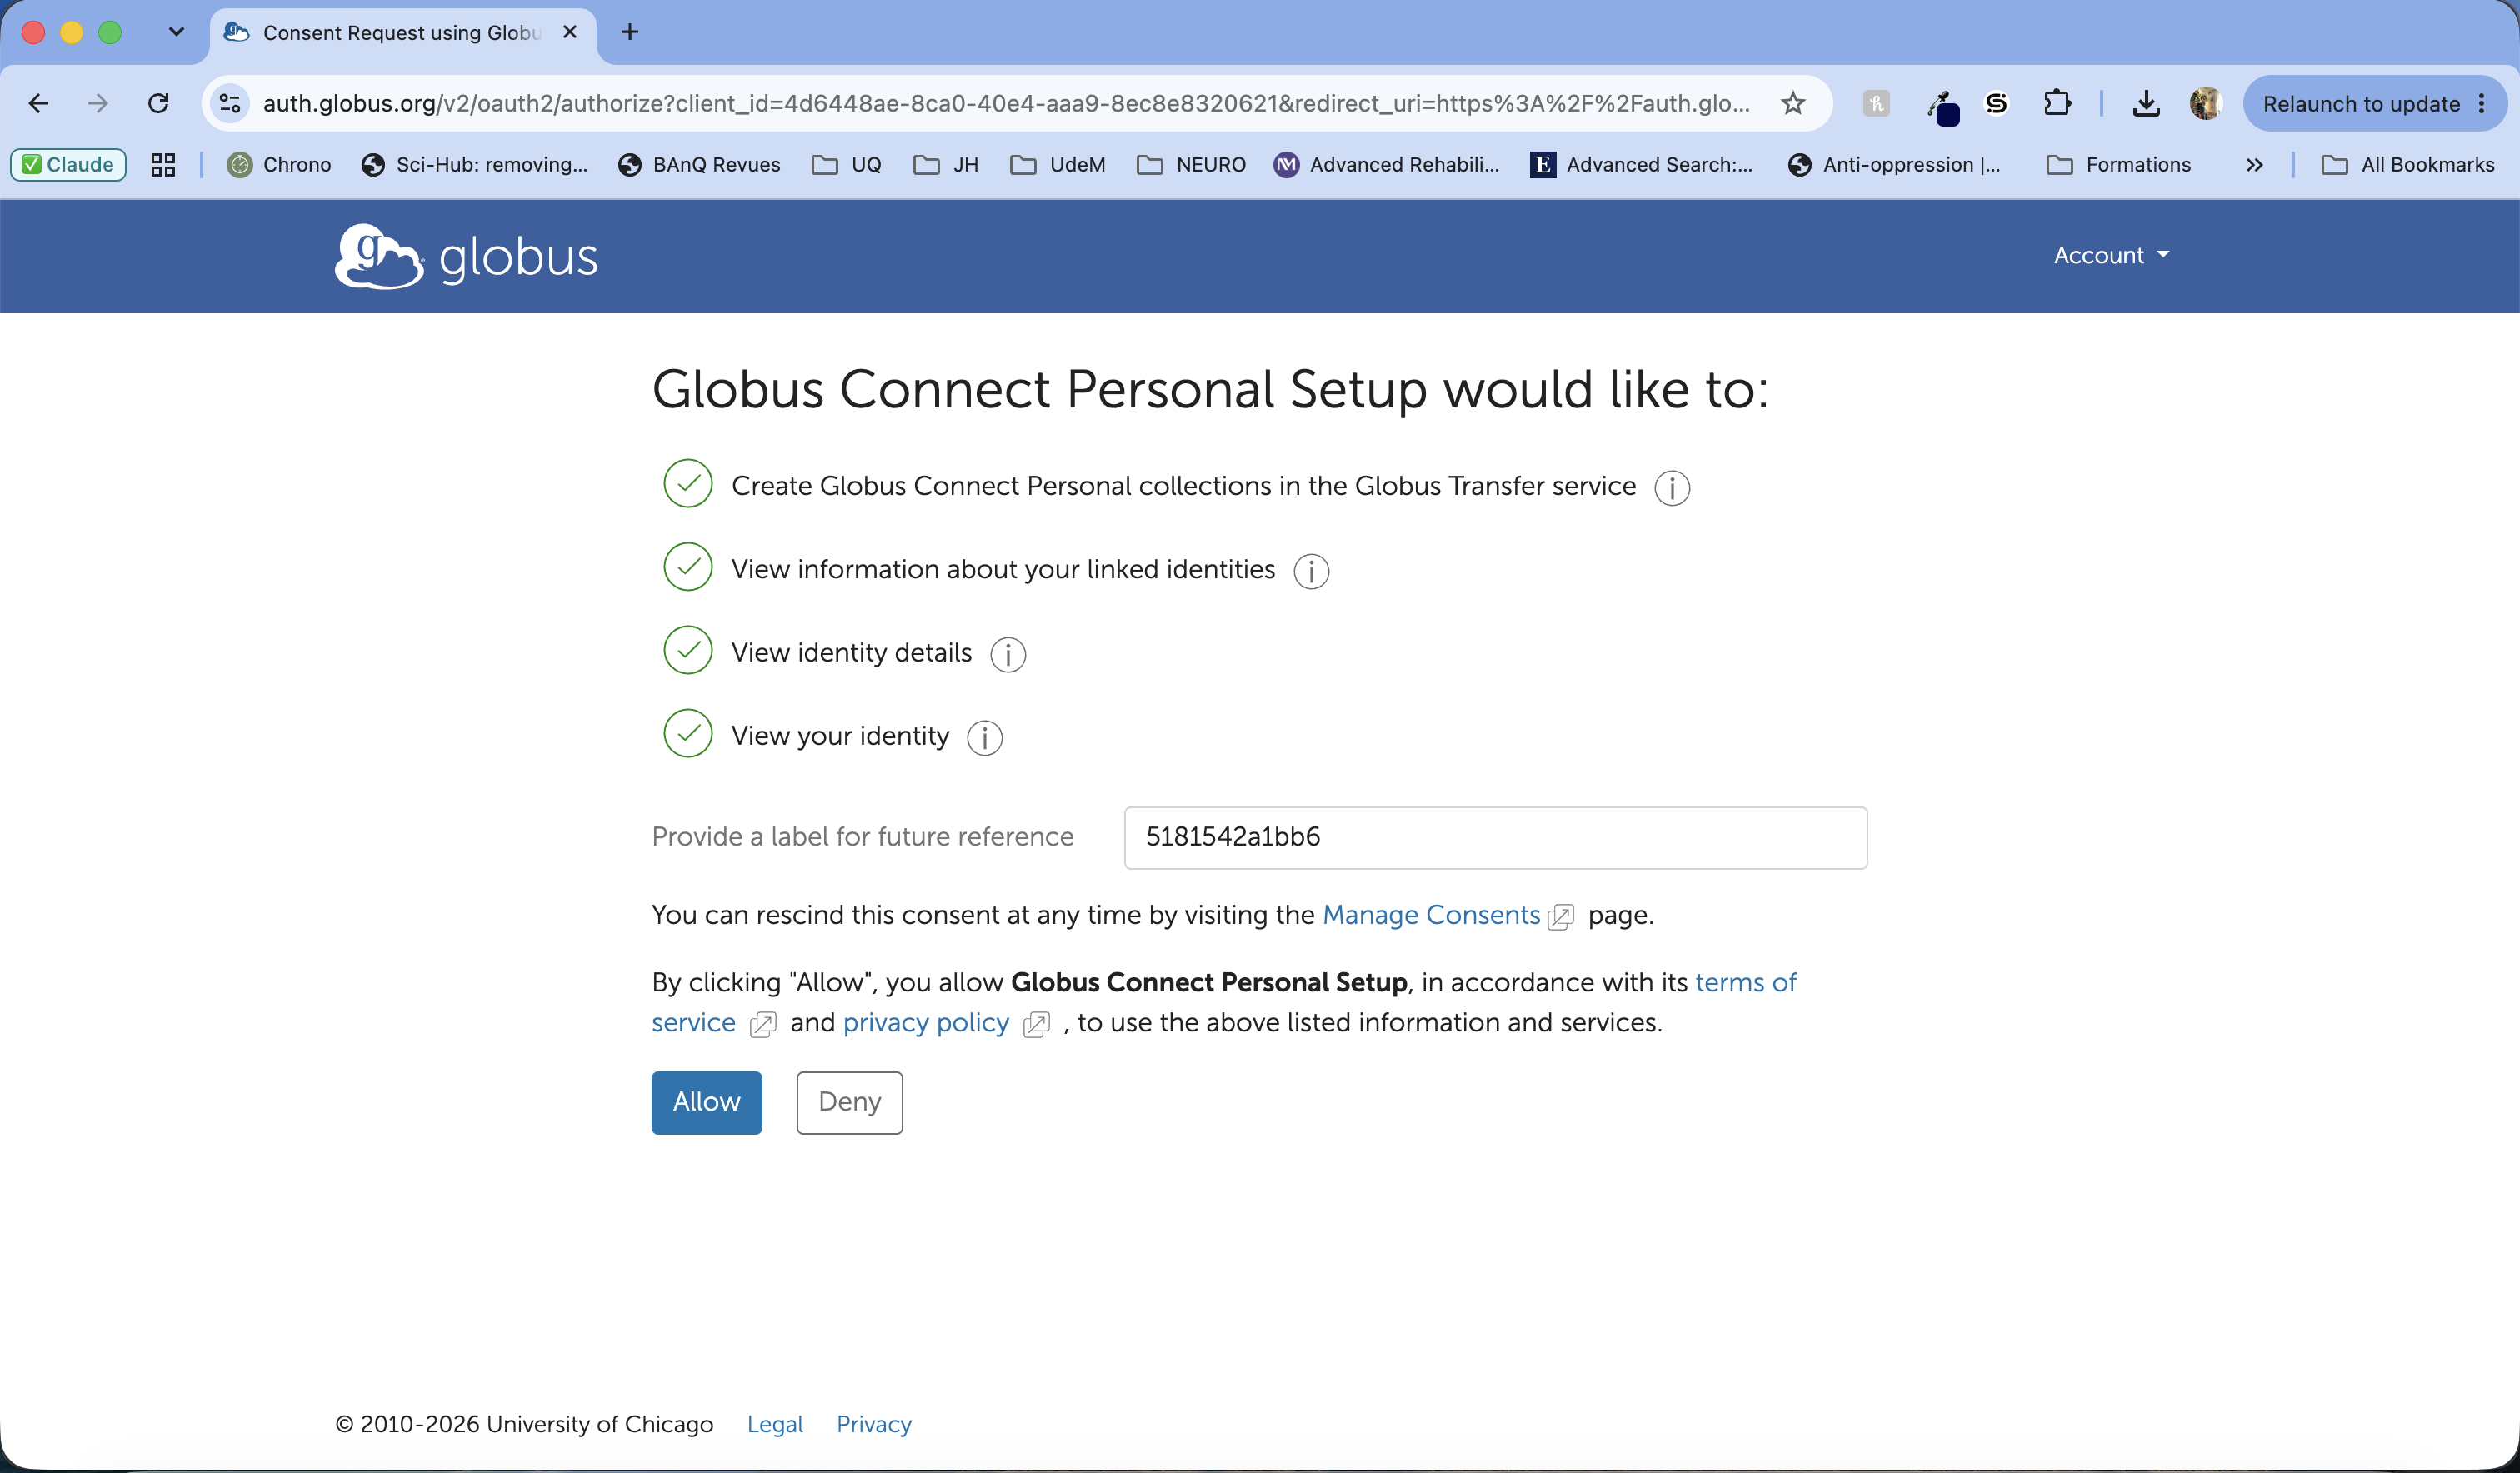
Review the requested permissions, enter a label that will help you identify this authorization later, and select Allow:
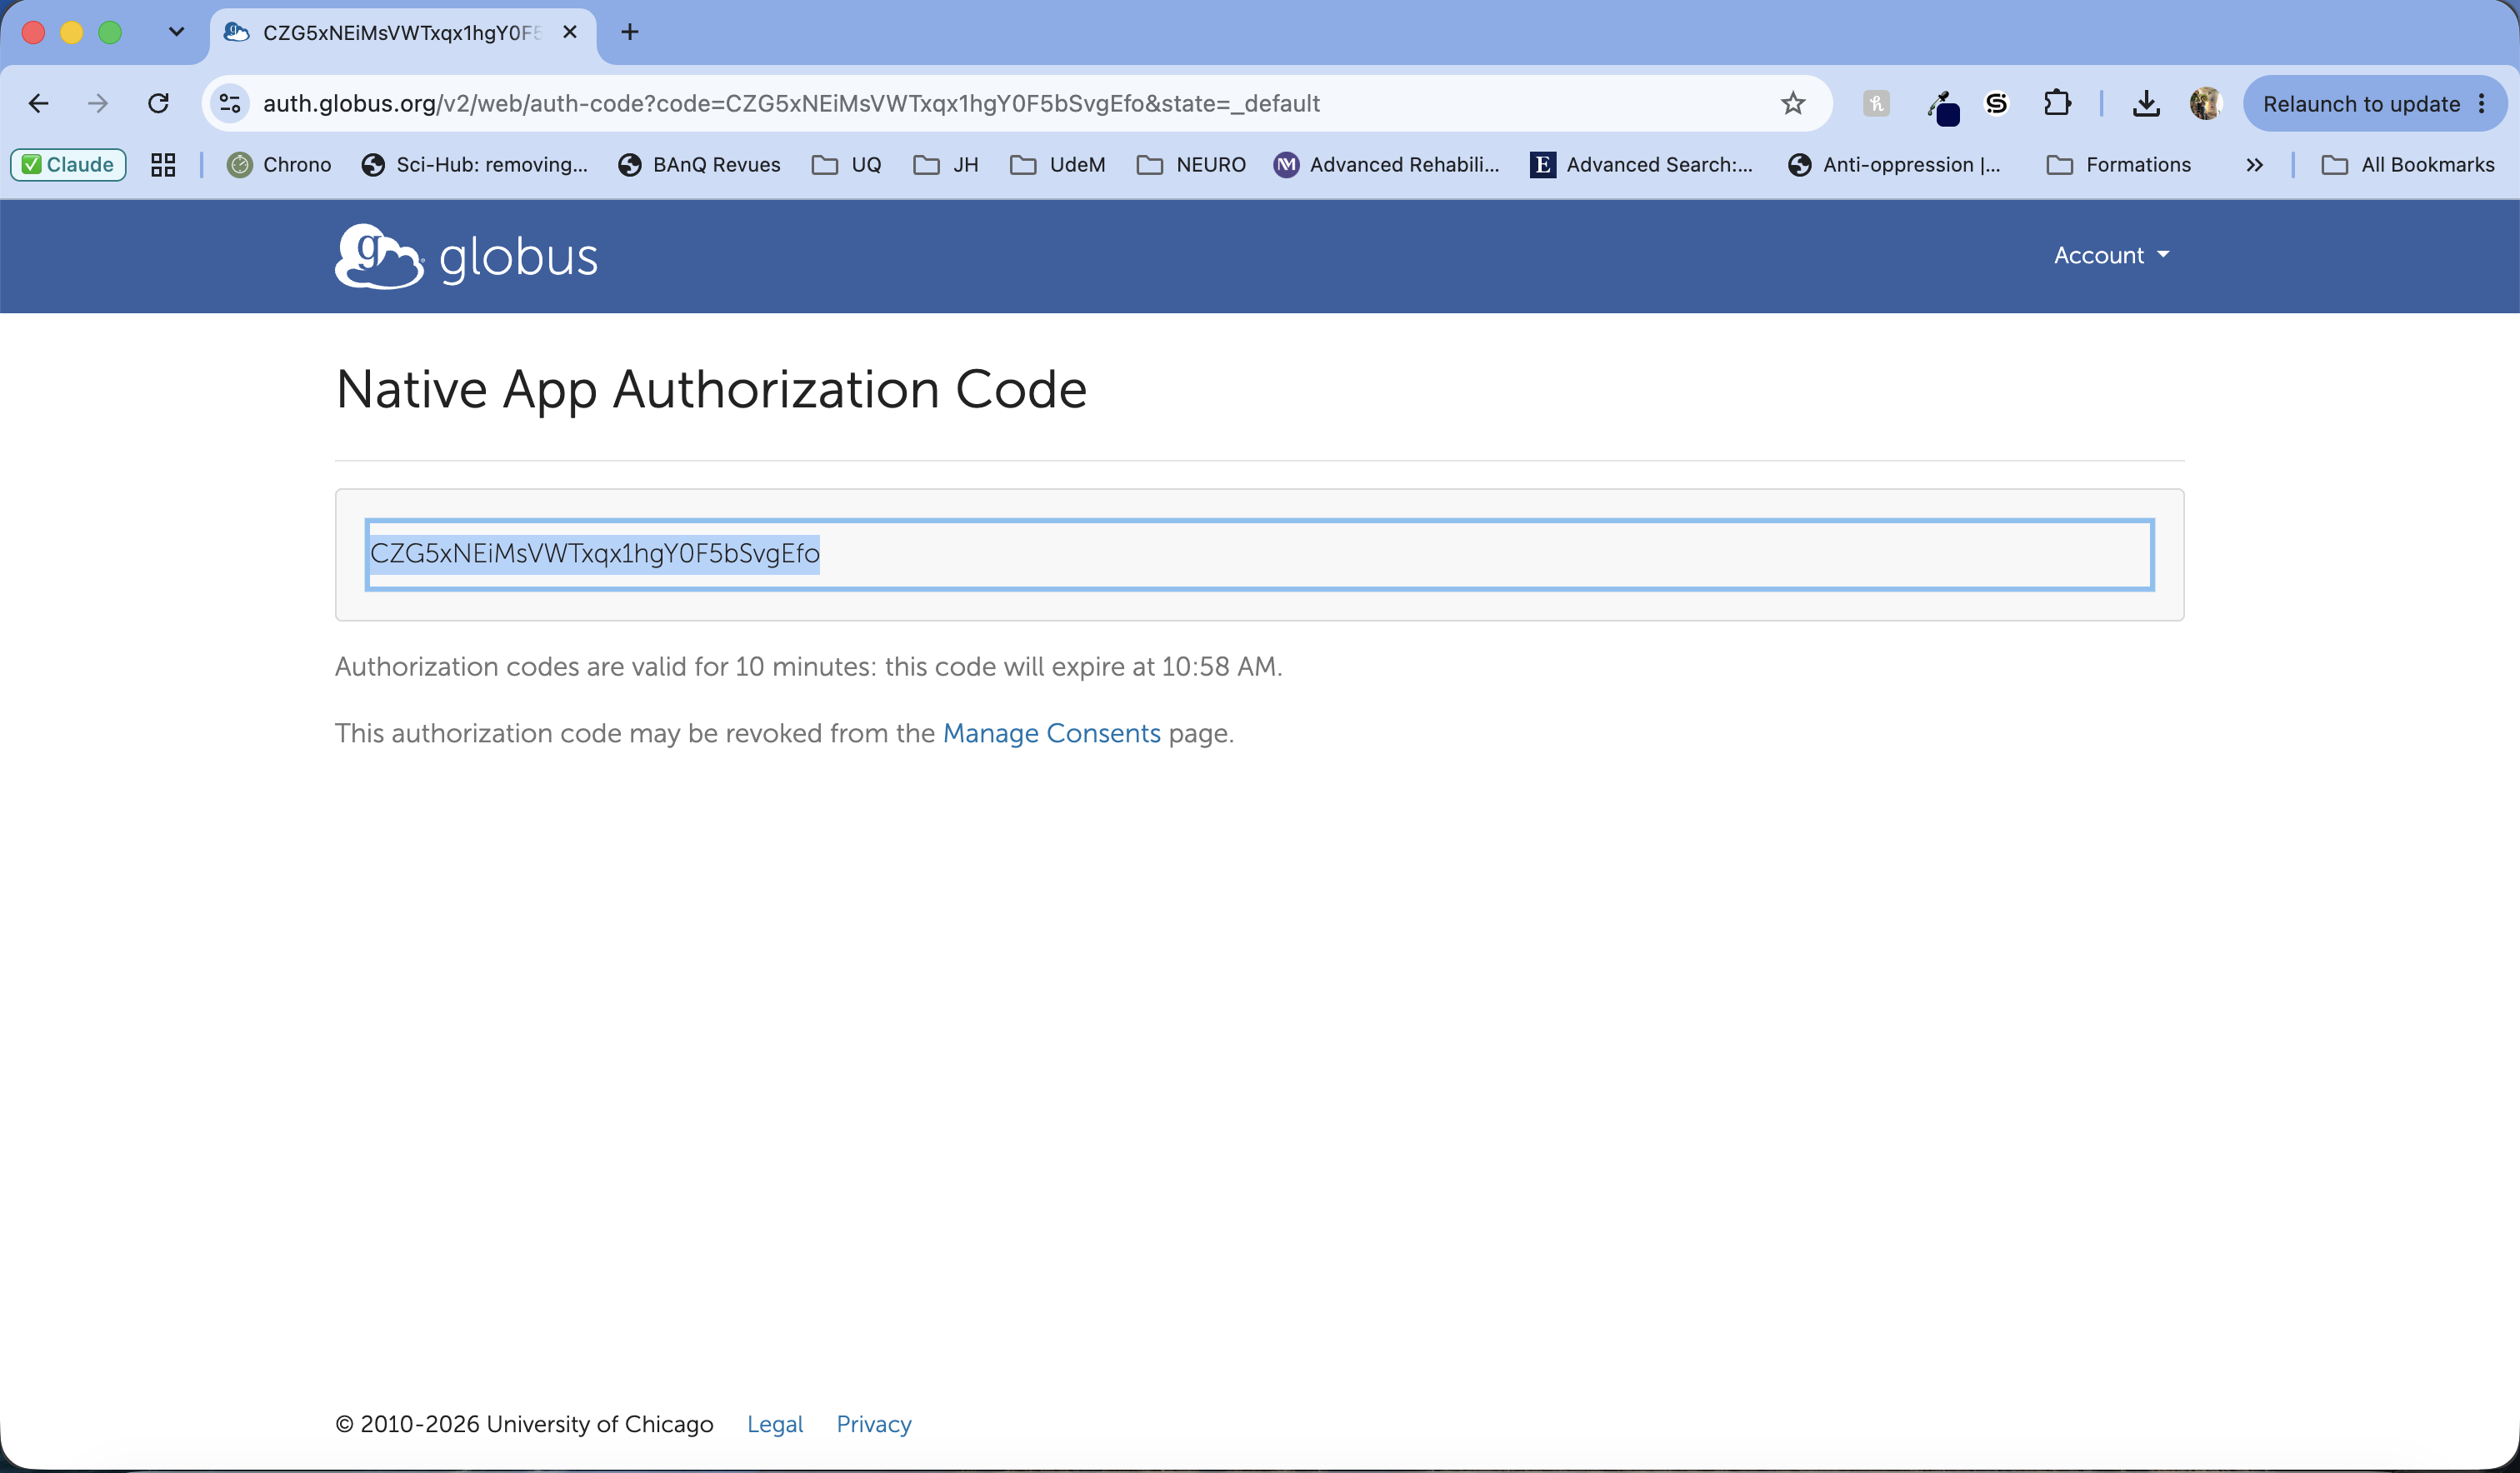
Globus then displays a single-use Native App Authorization Code. Copy this code; it is valid for 10 minutes:
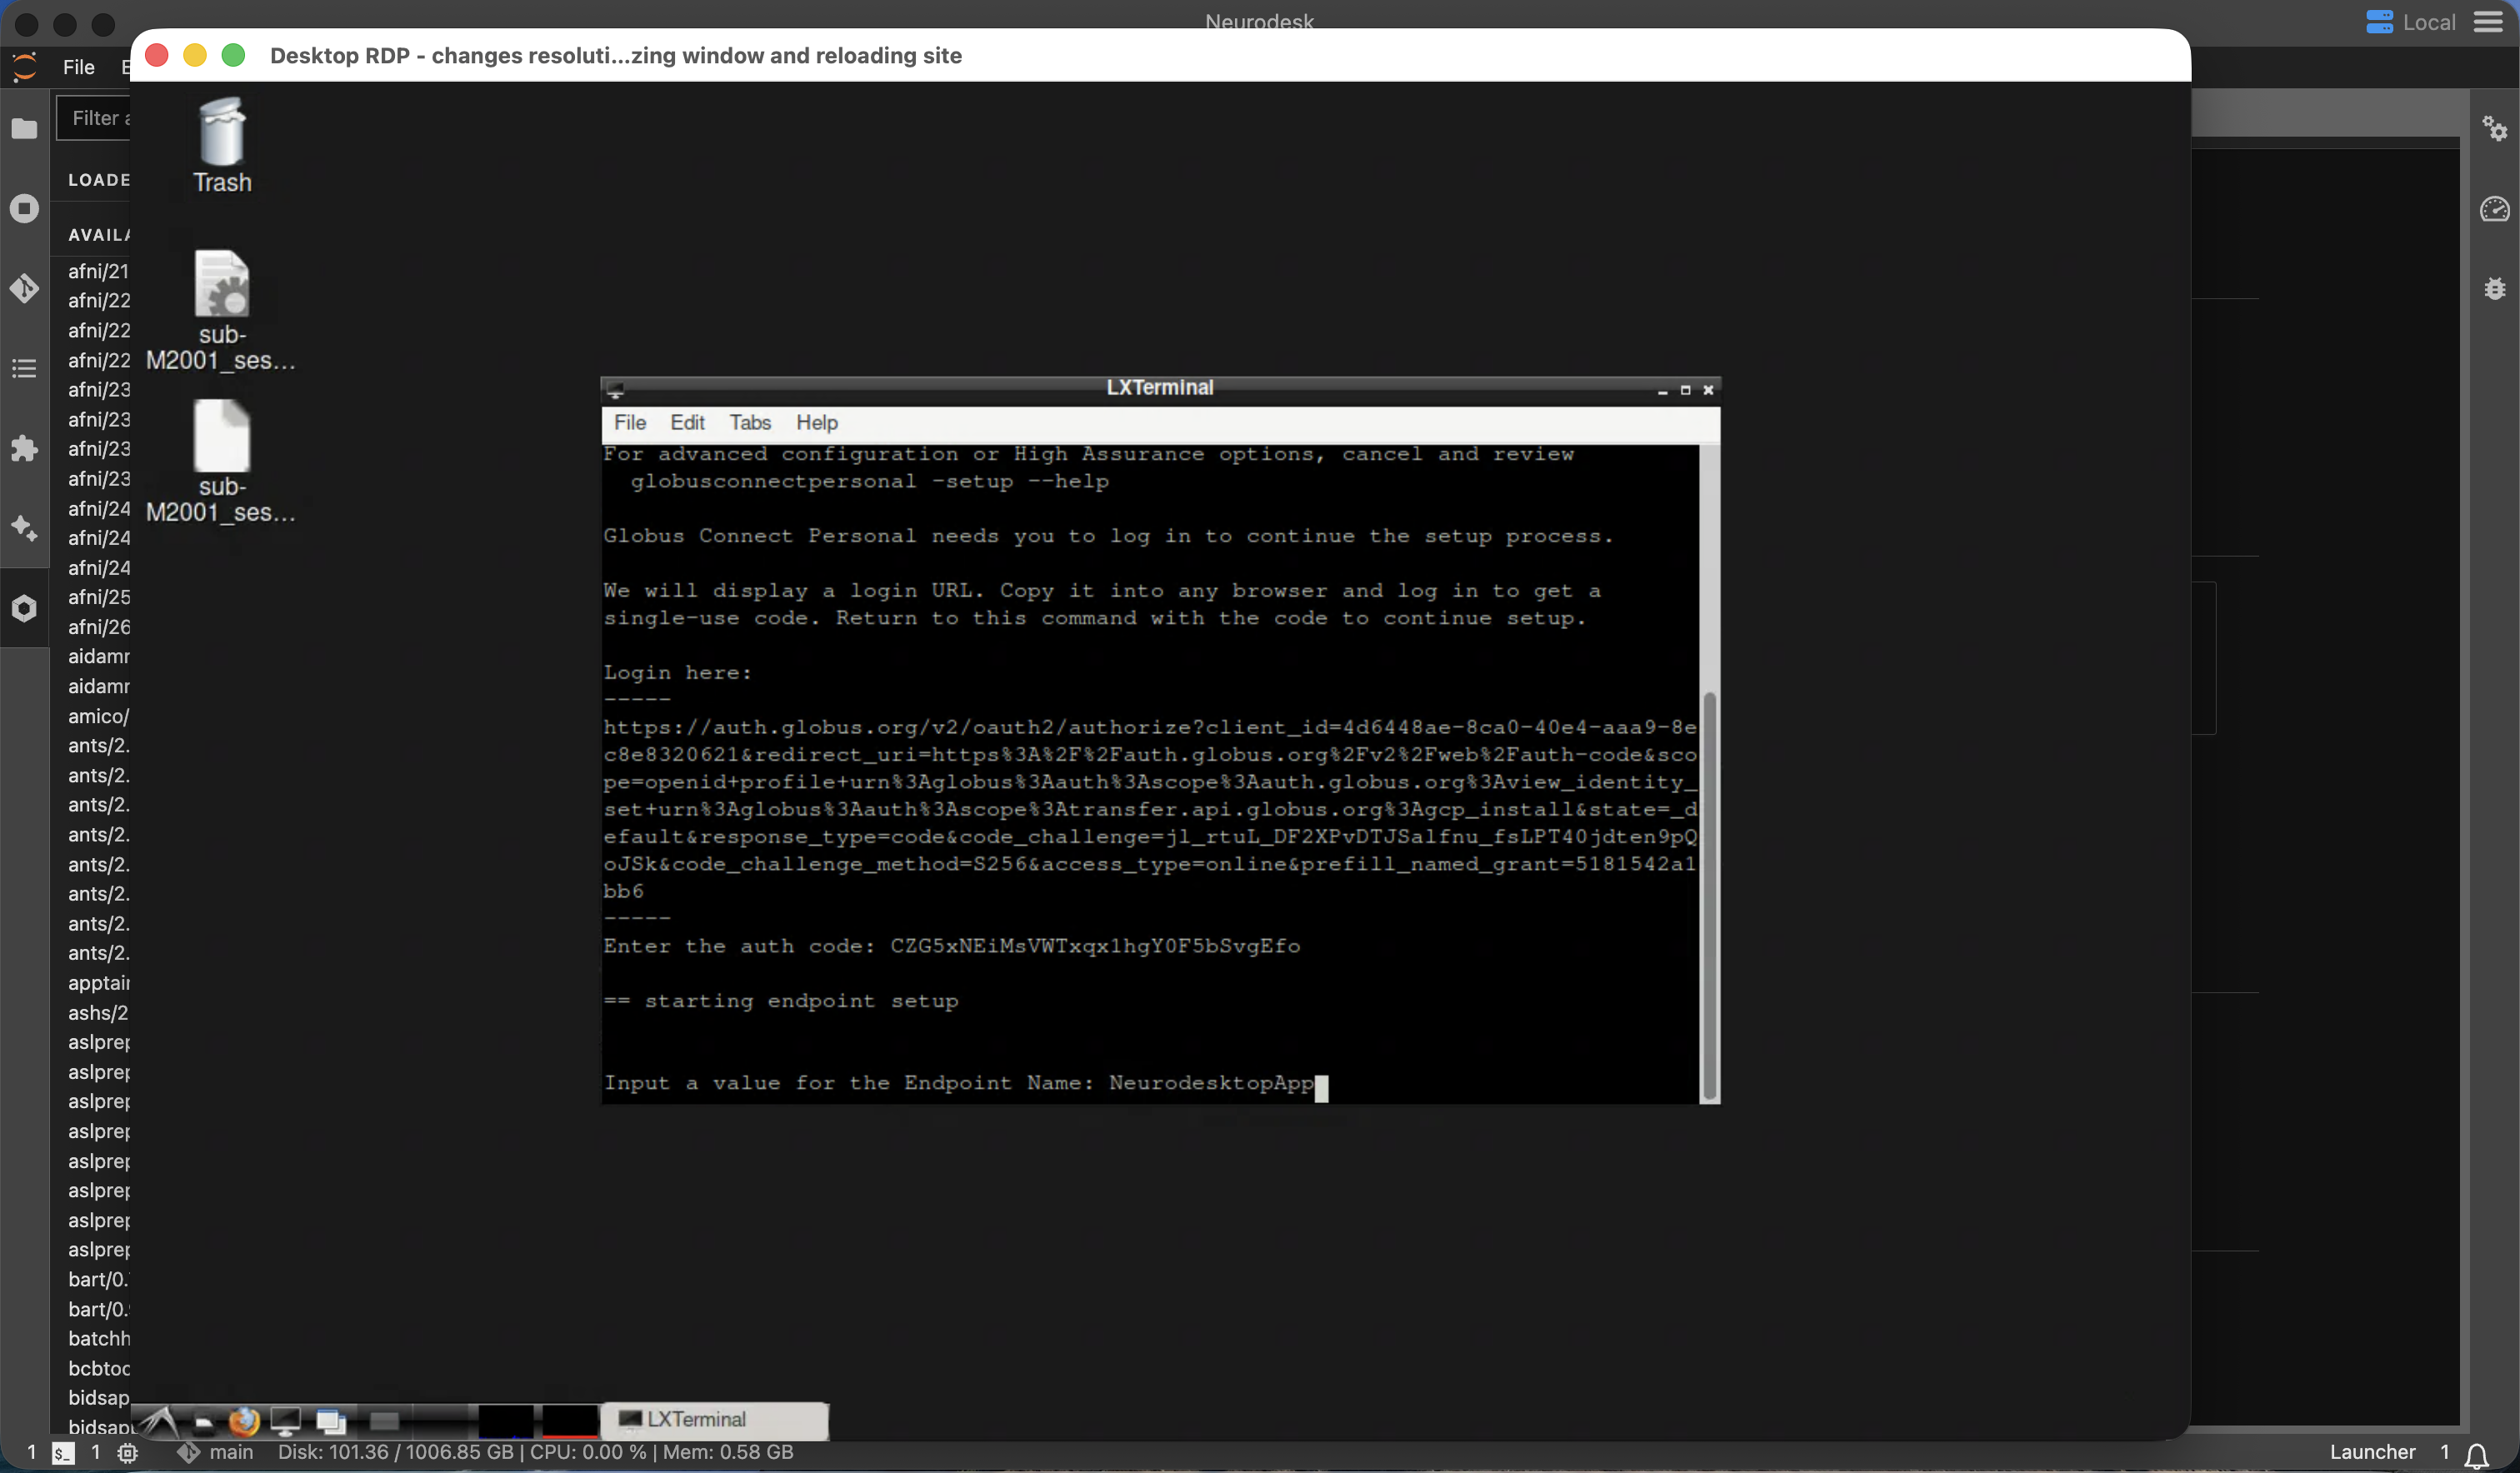
Return to the Neurodesktop terminal, paste the code at the Enter the auth code prompt, and press Enter. When prompted, enter a descriptive endpoint name, such as NeurodesktopApp:
After setup completes, start the Globus Connect Personal interface:
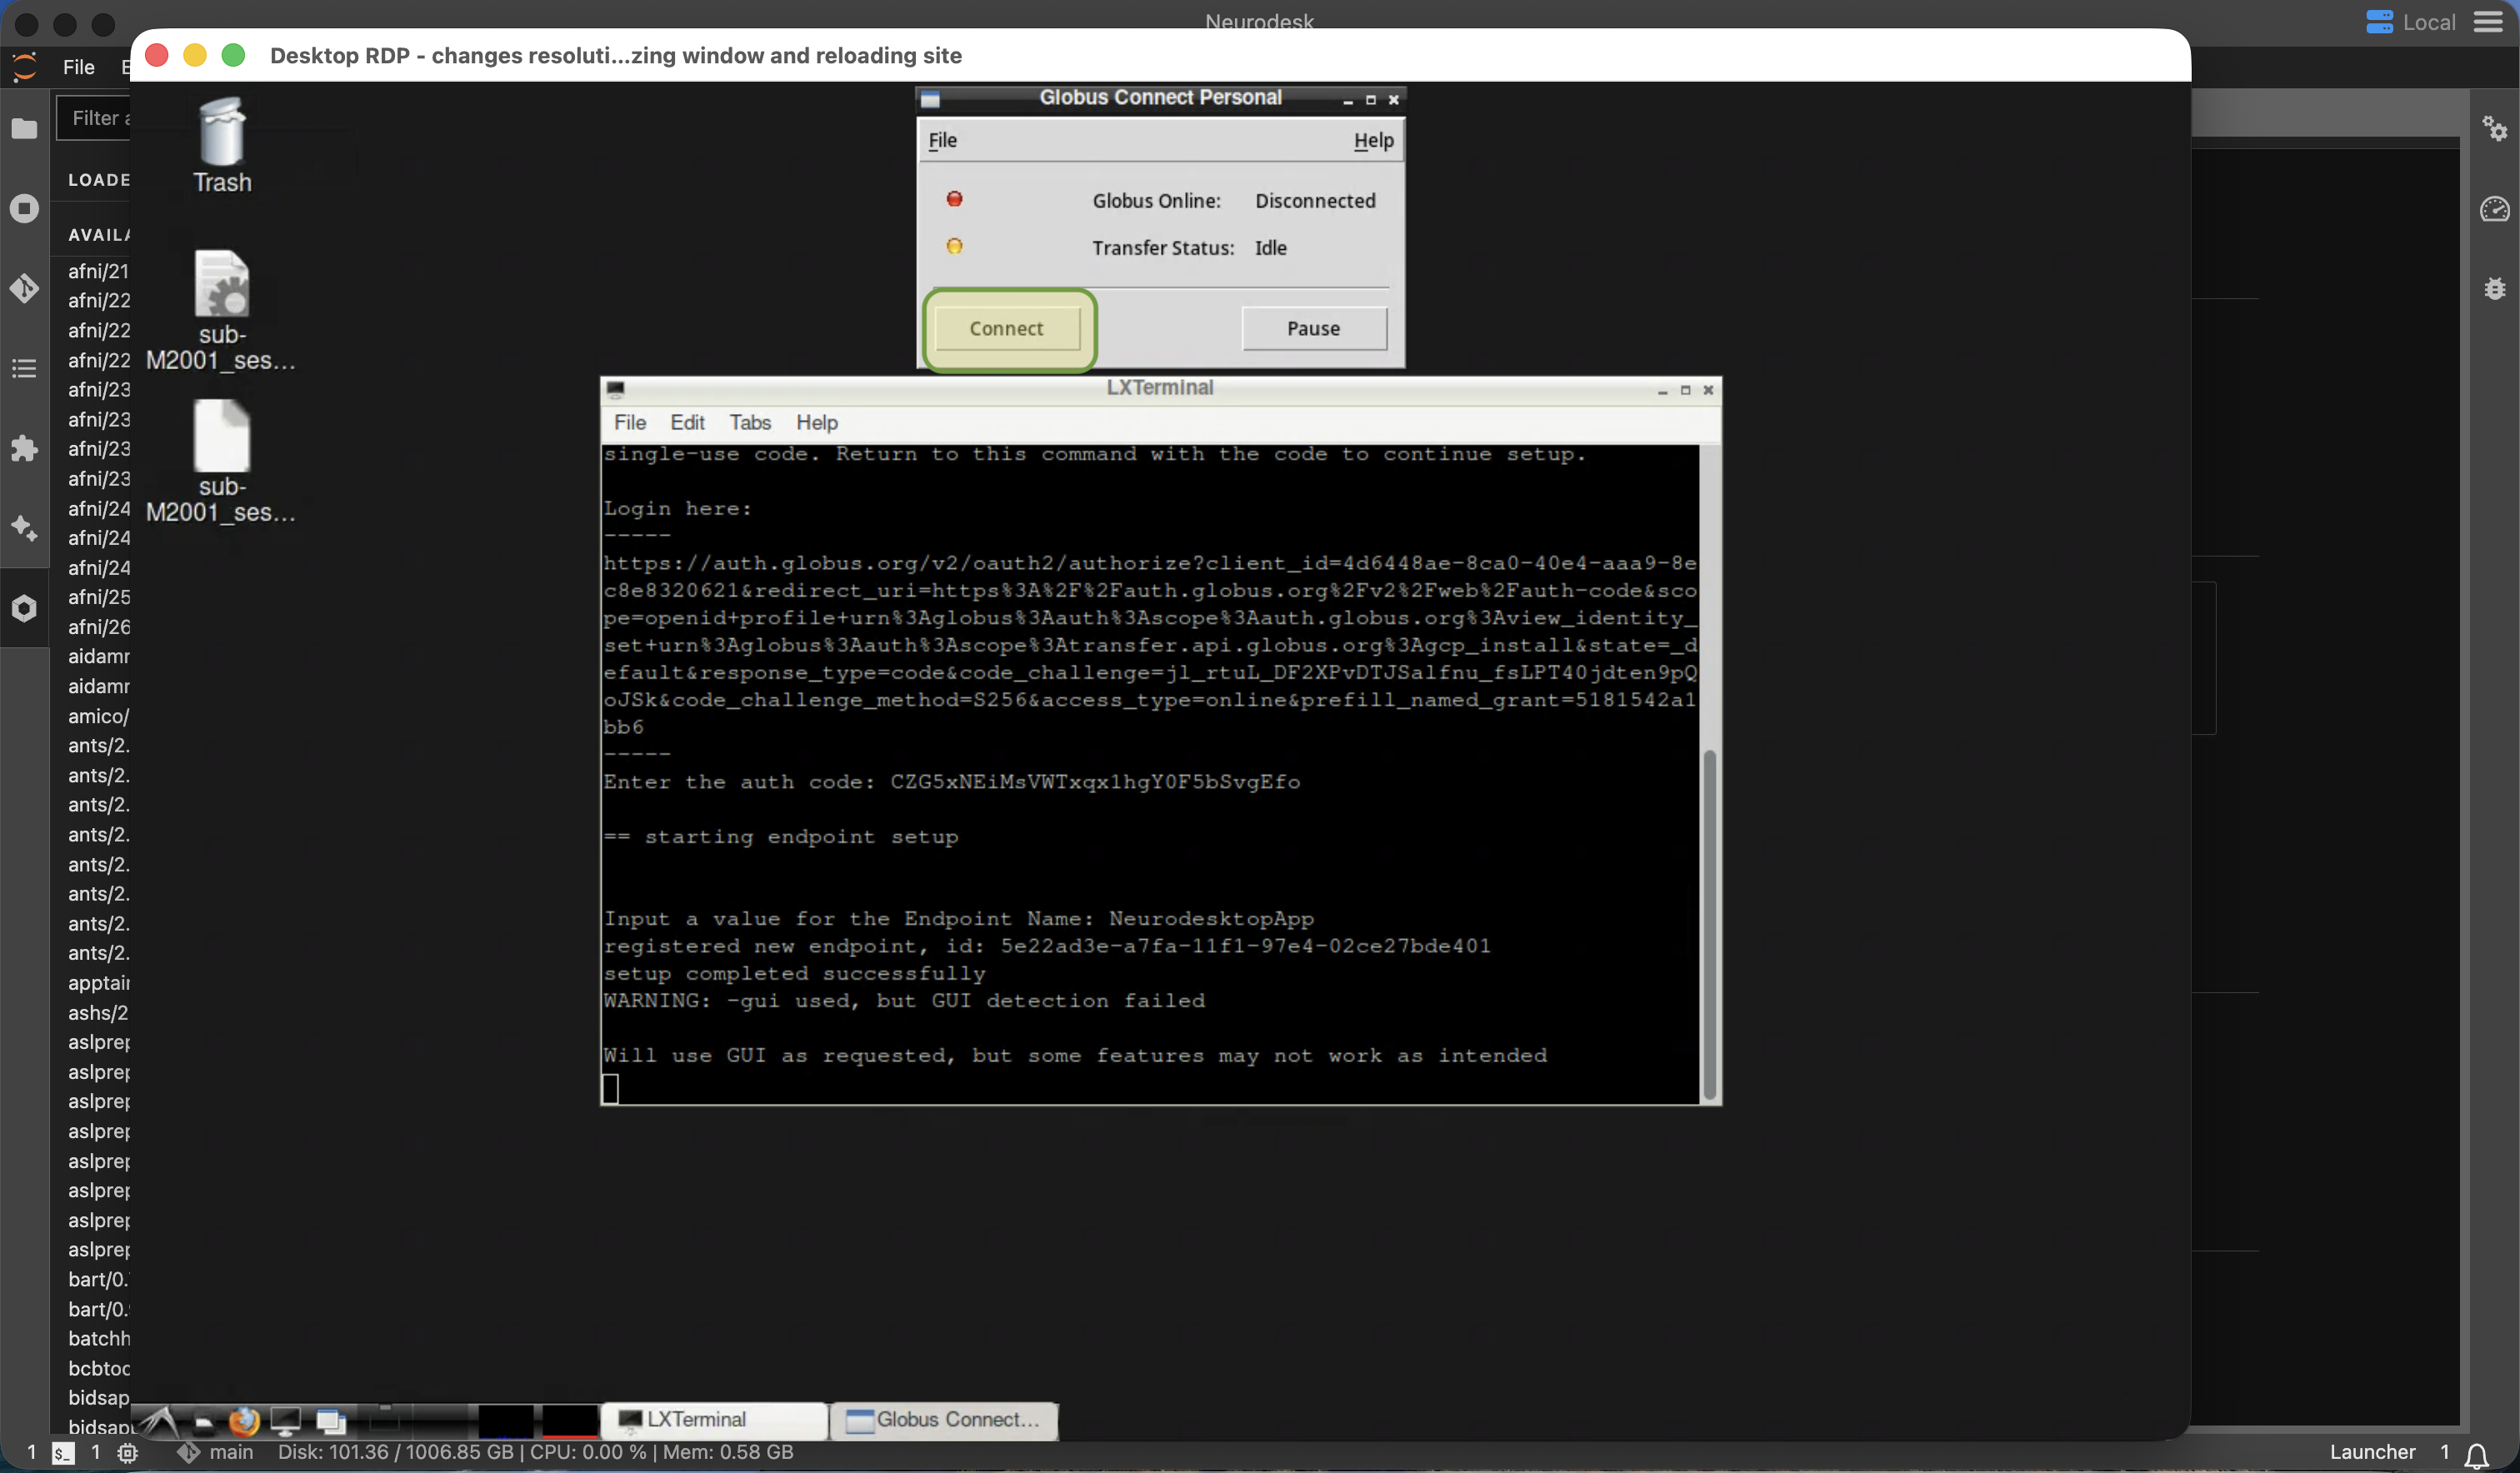
globusconnectpersonal -guiSelect Connect and wait for the Globus Online status to change to Connected:
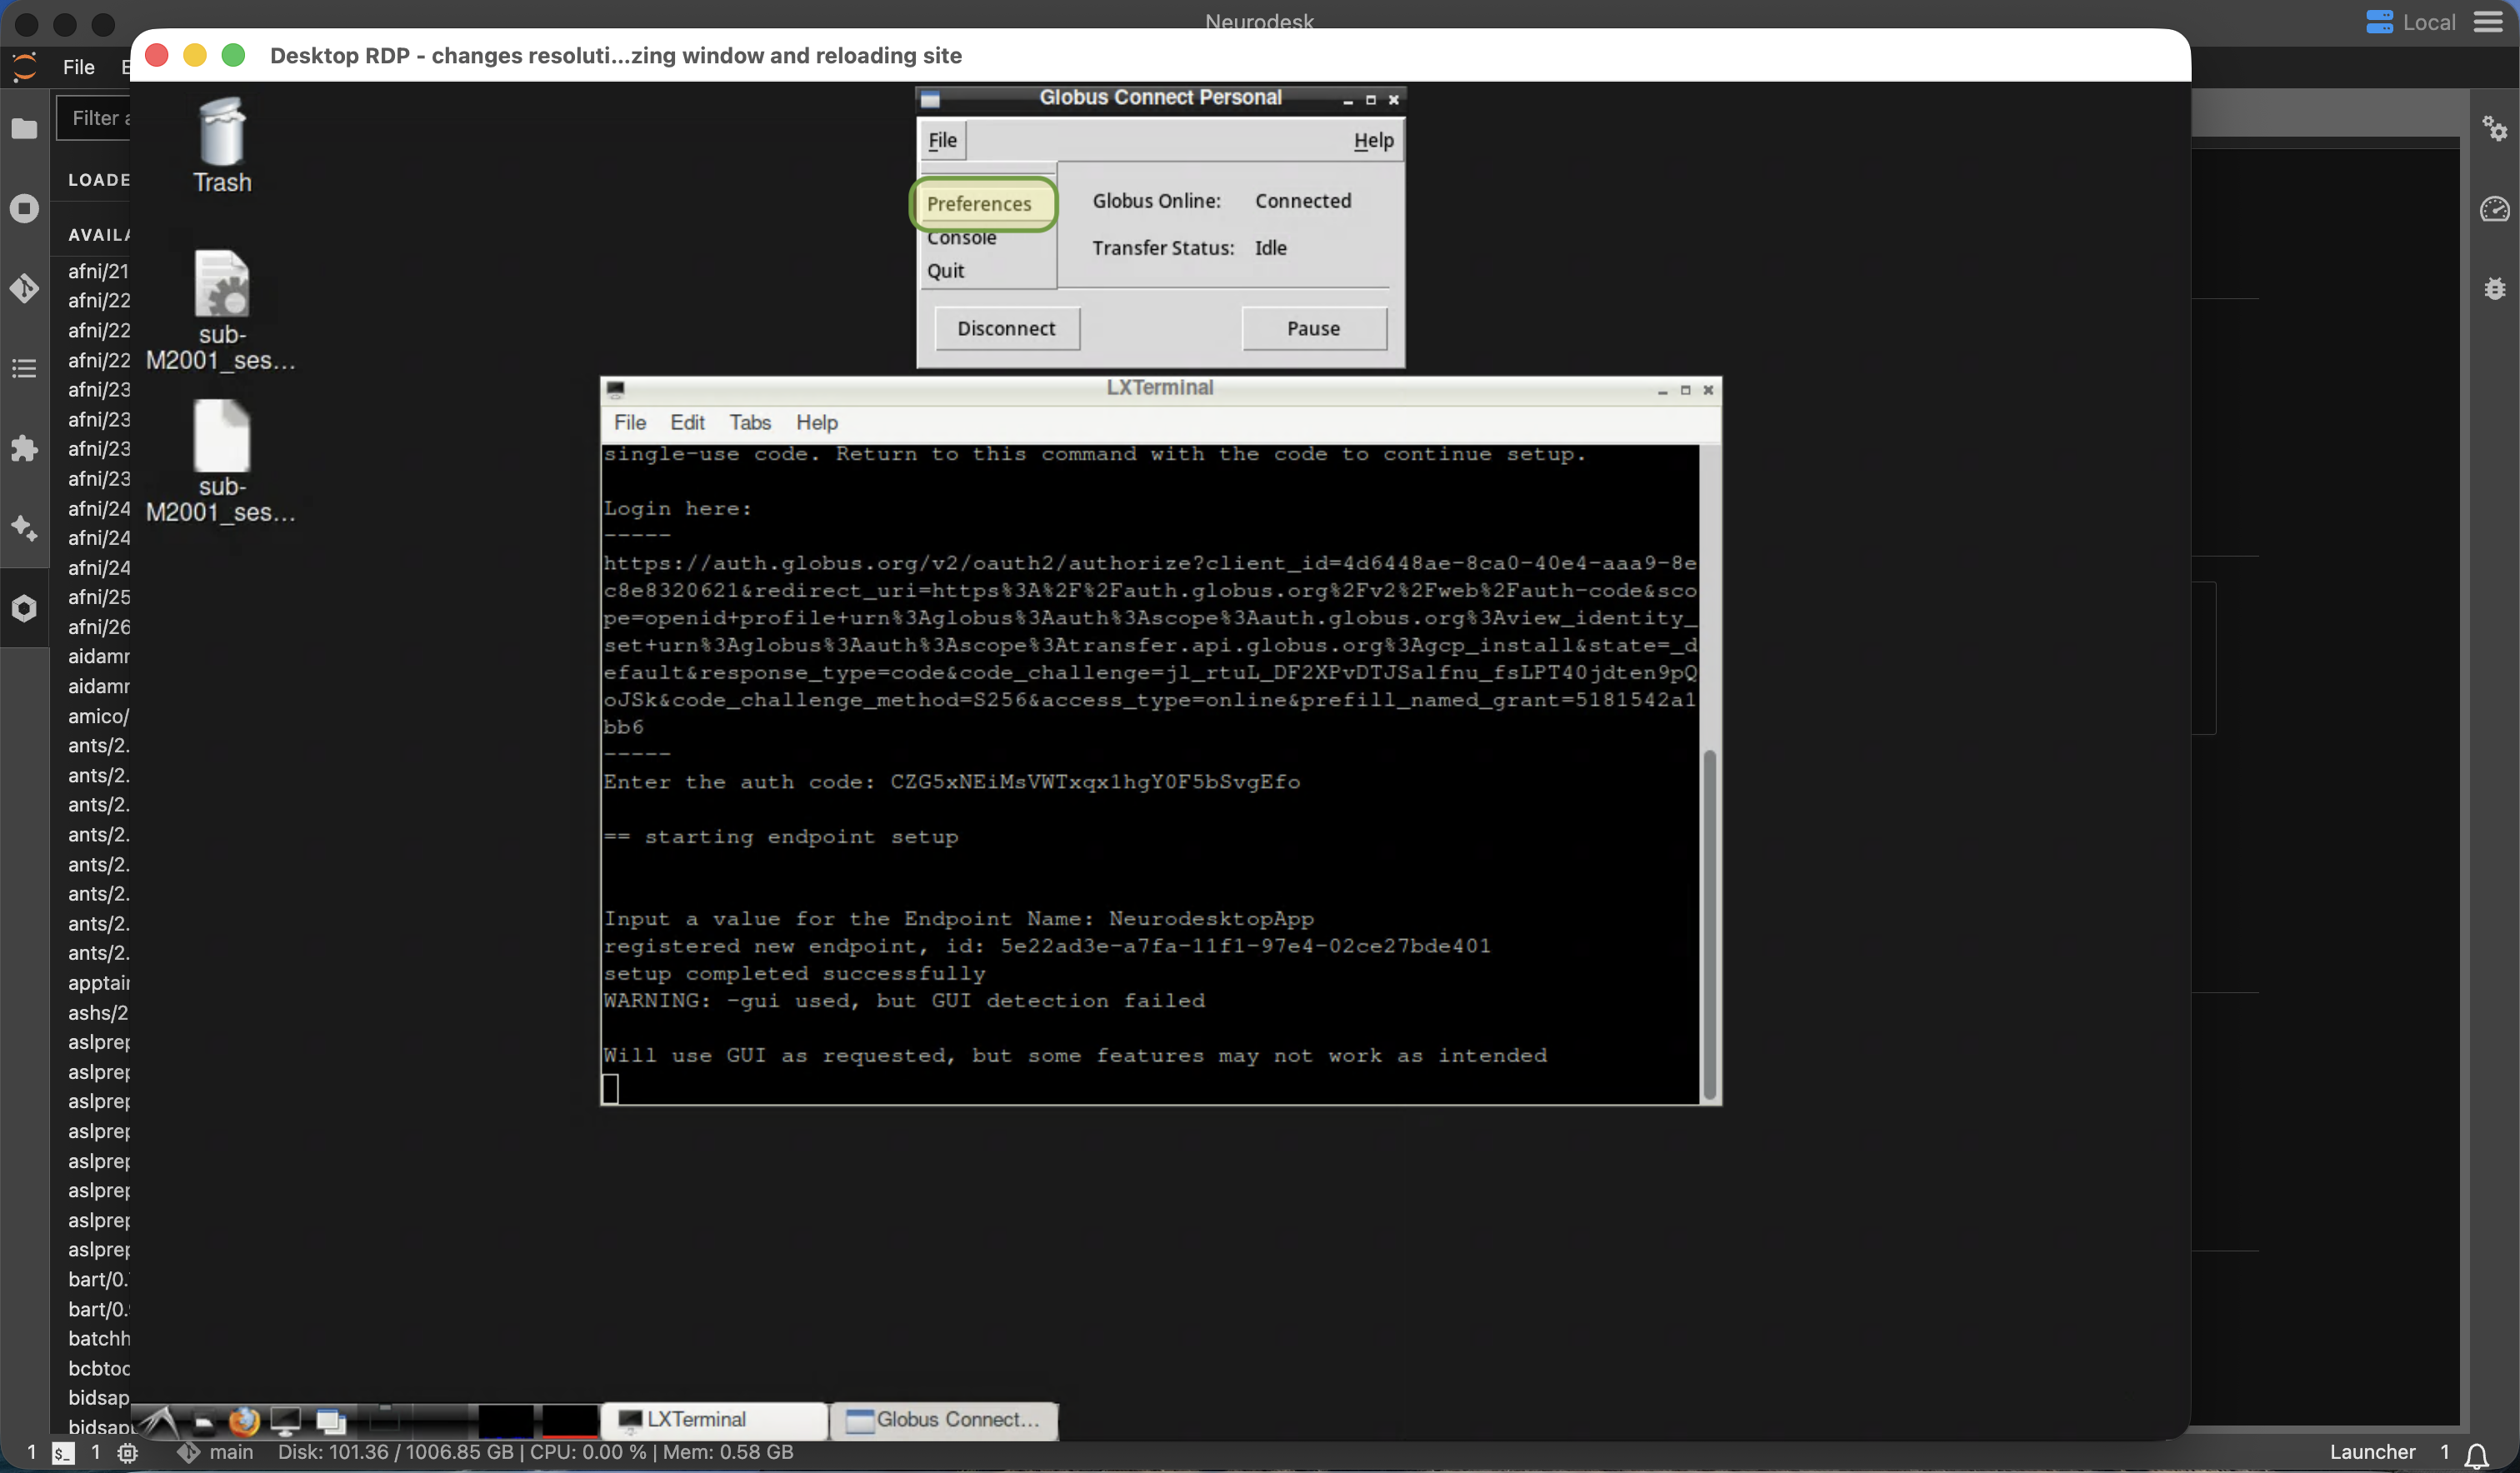
To choose which Neurodesktop directories Globus can access, open File → Preferences:
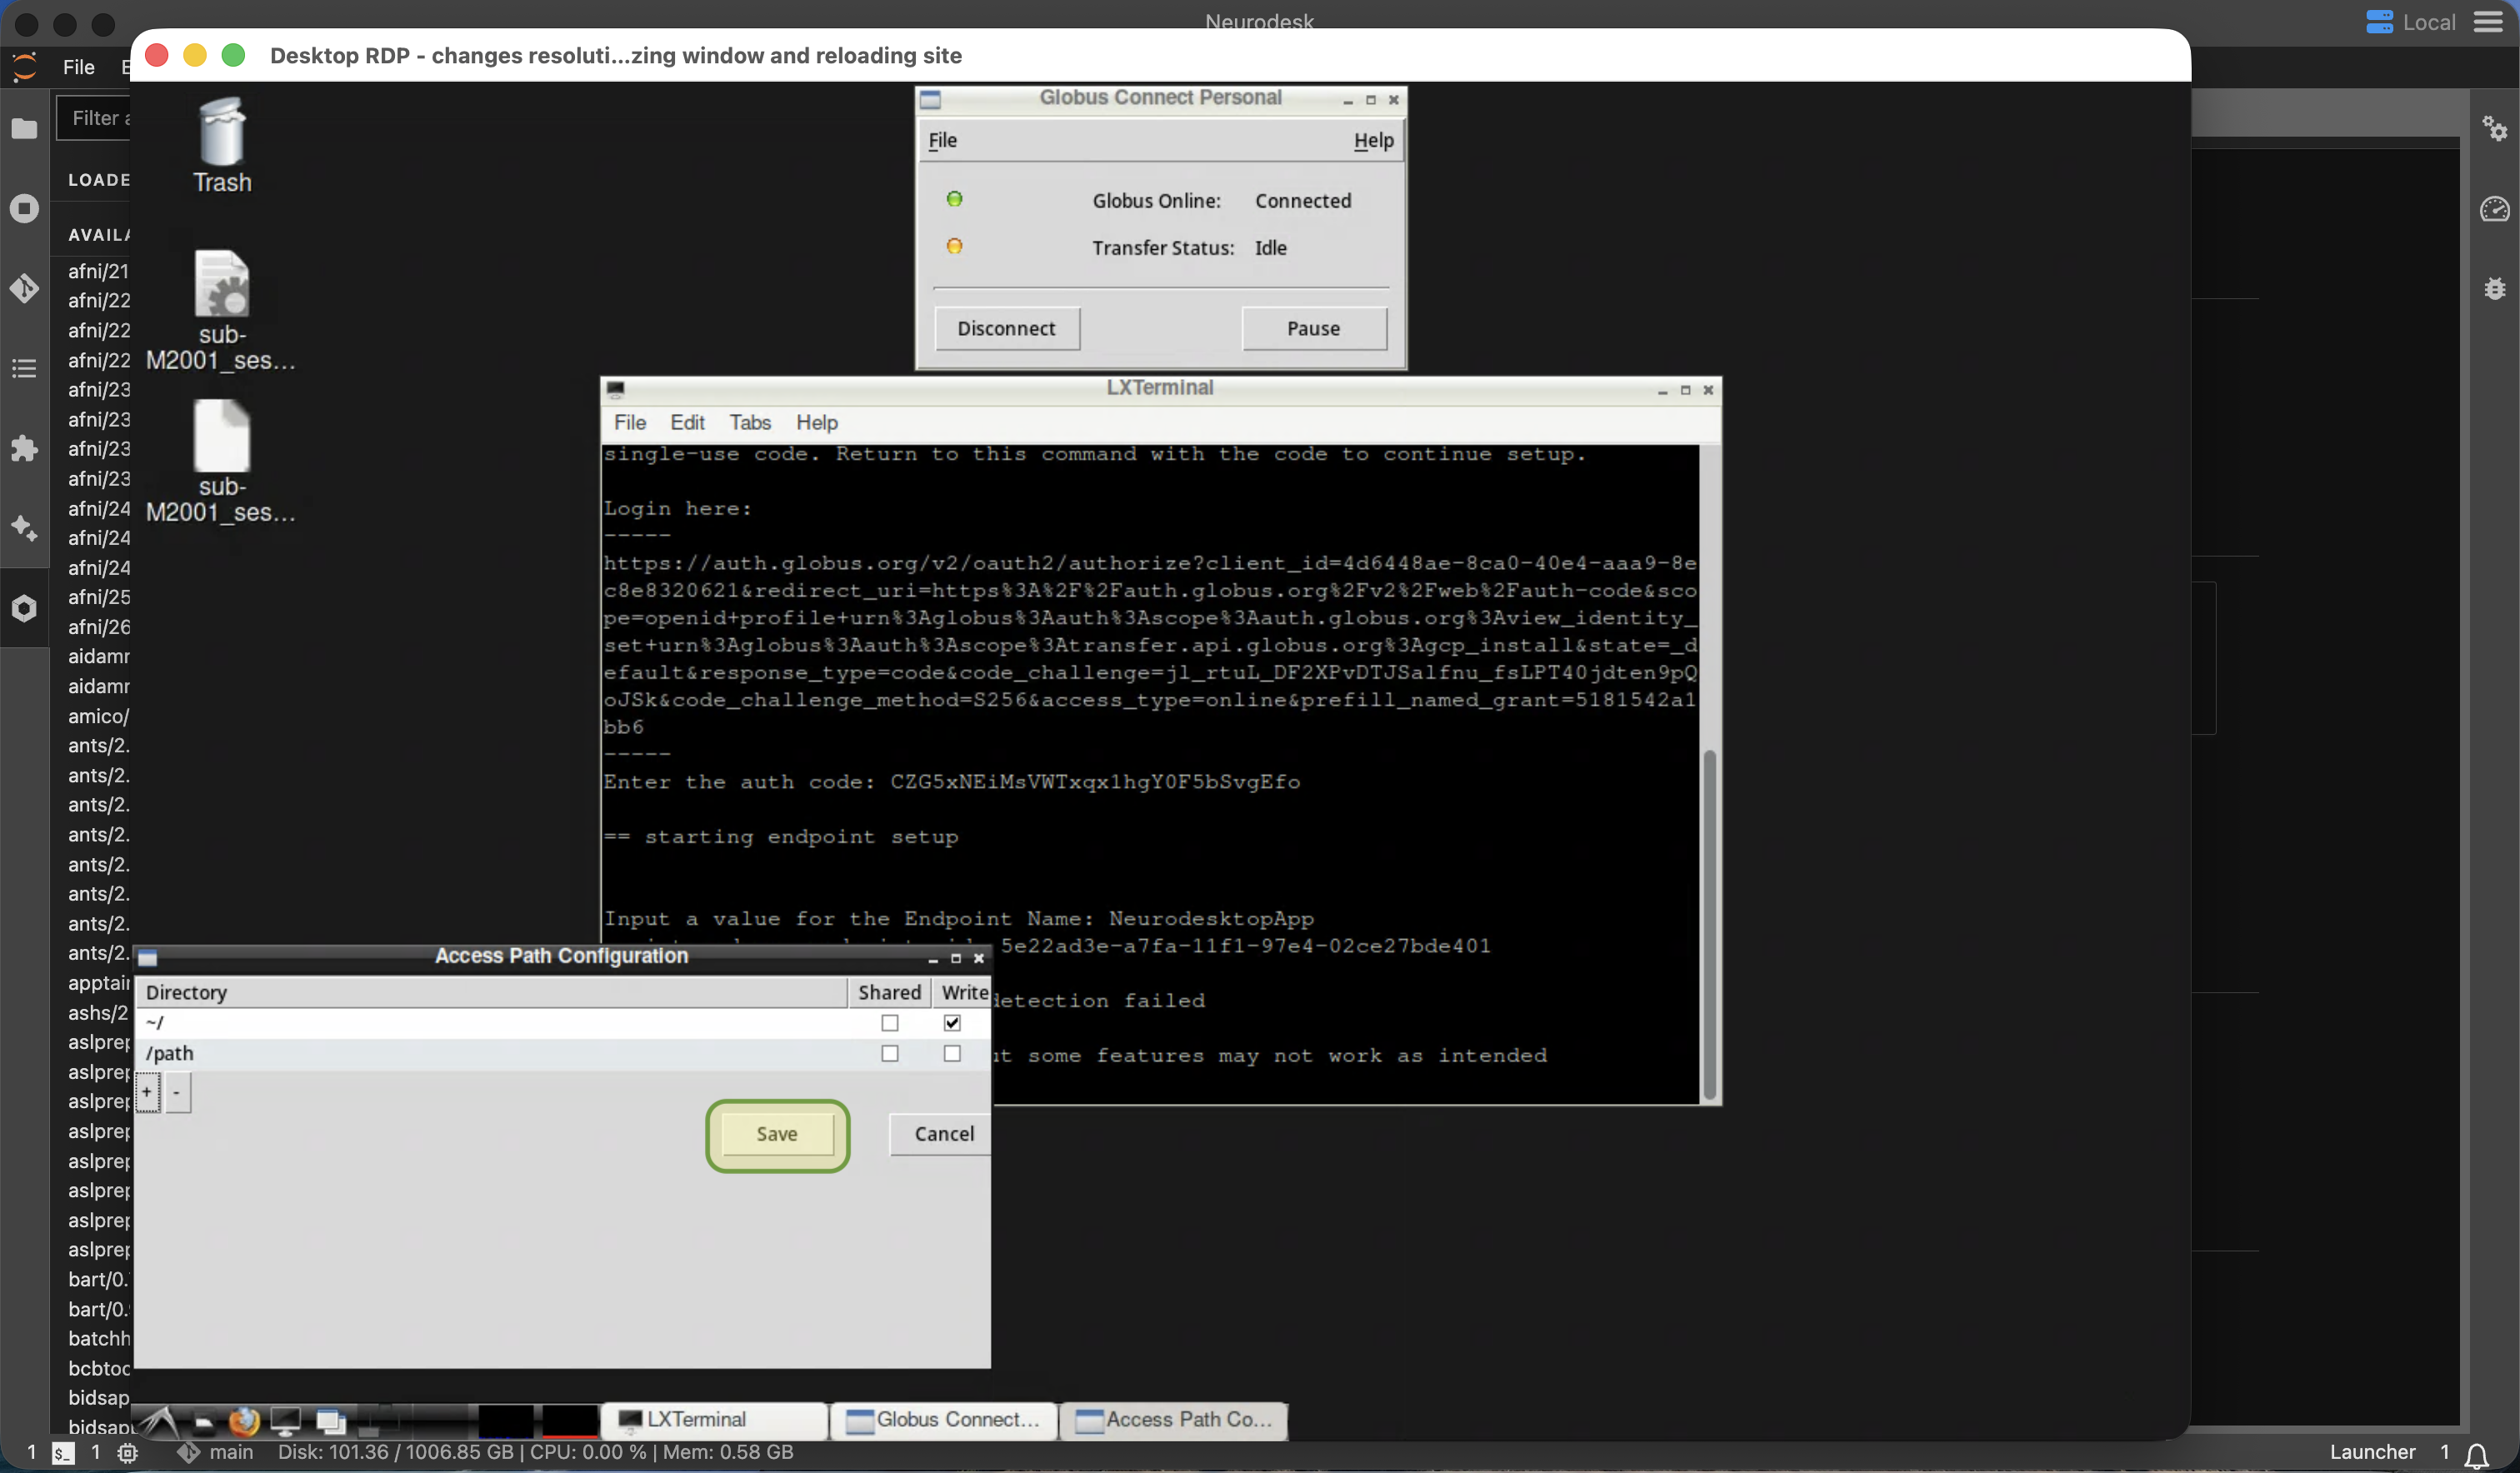
Use the + button to add each directory, then select the Shared and Write permissions appropriate for each path. Select Save when the access paths are configured:
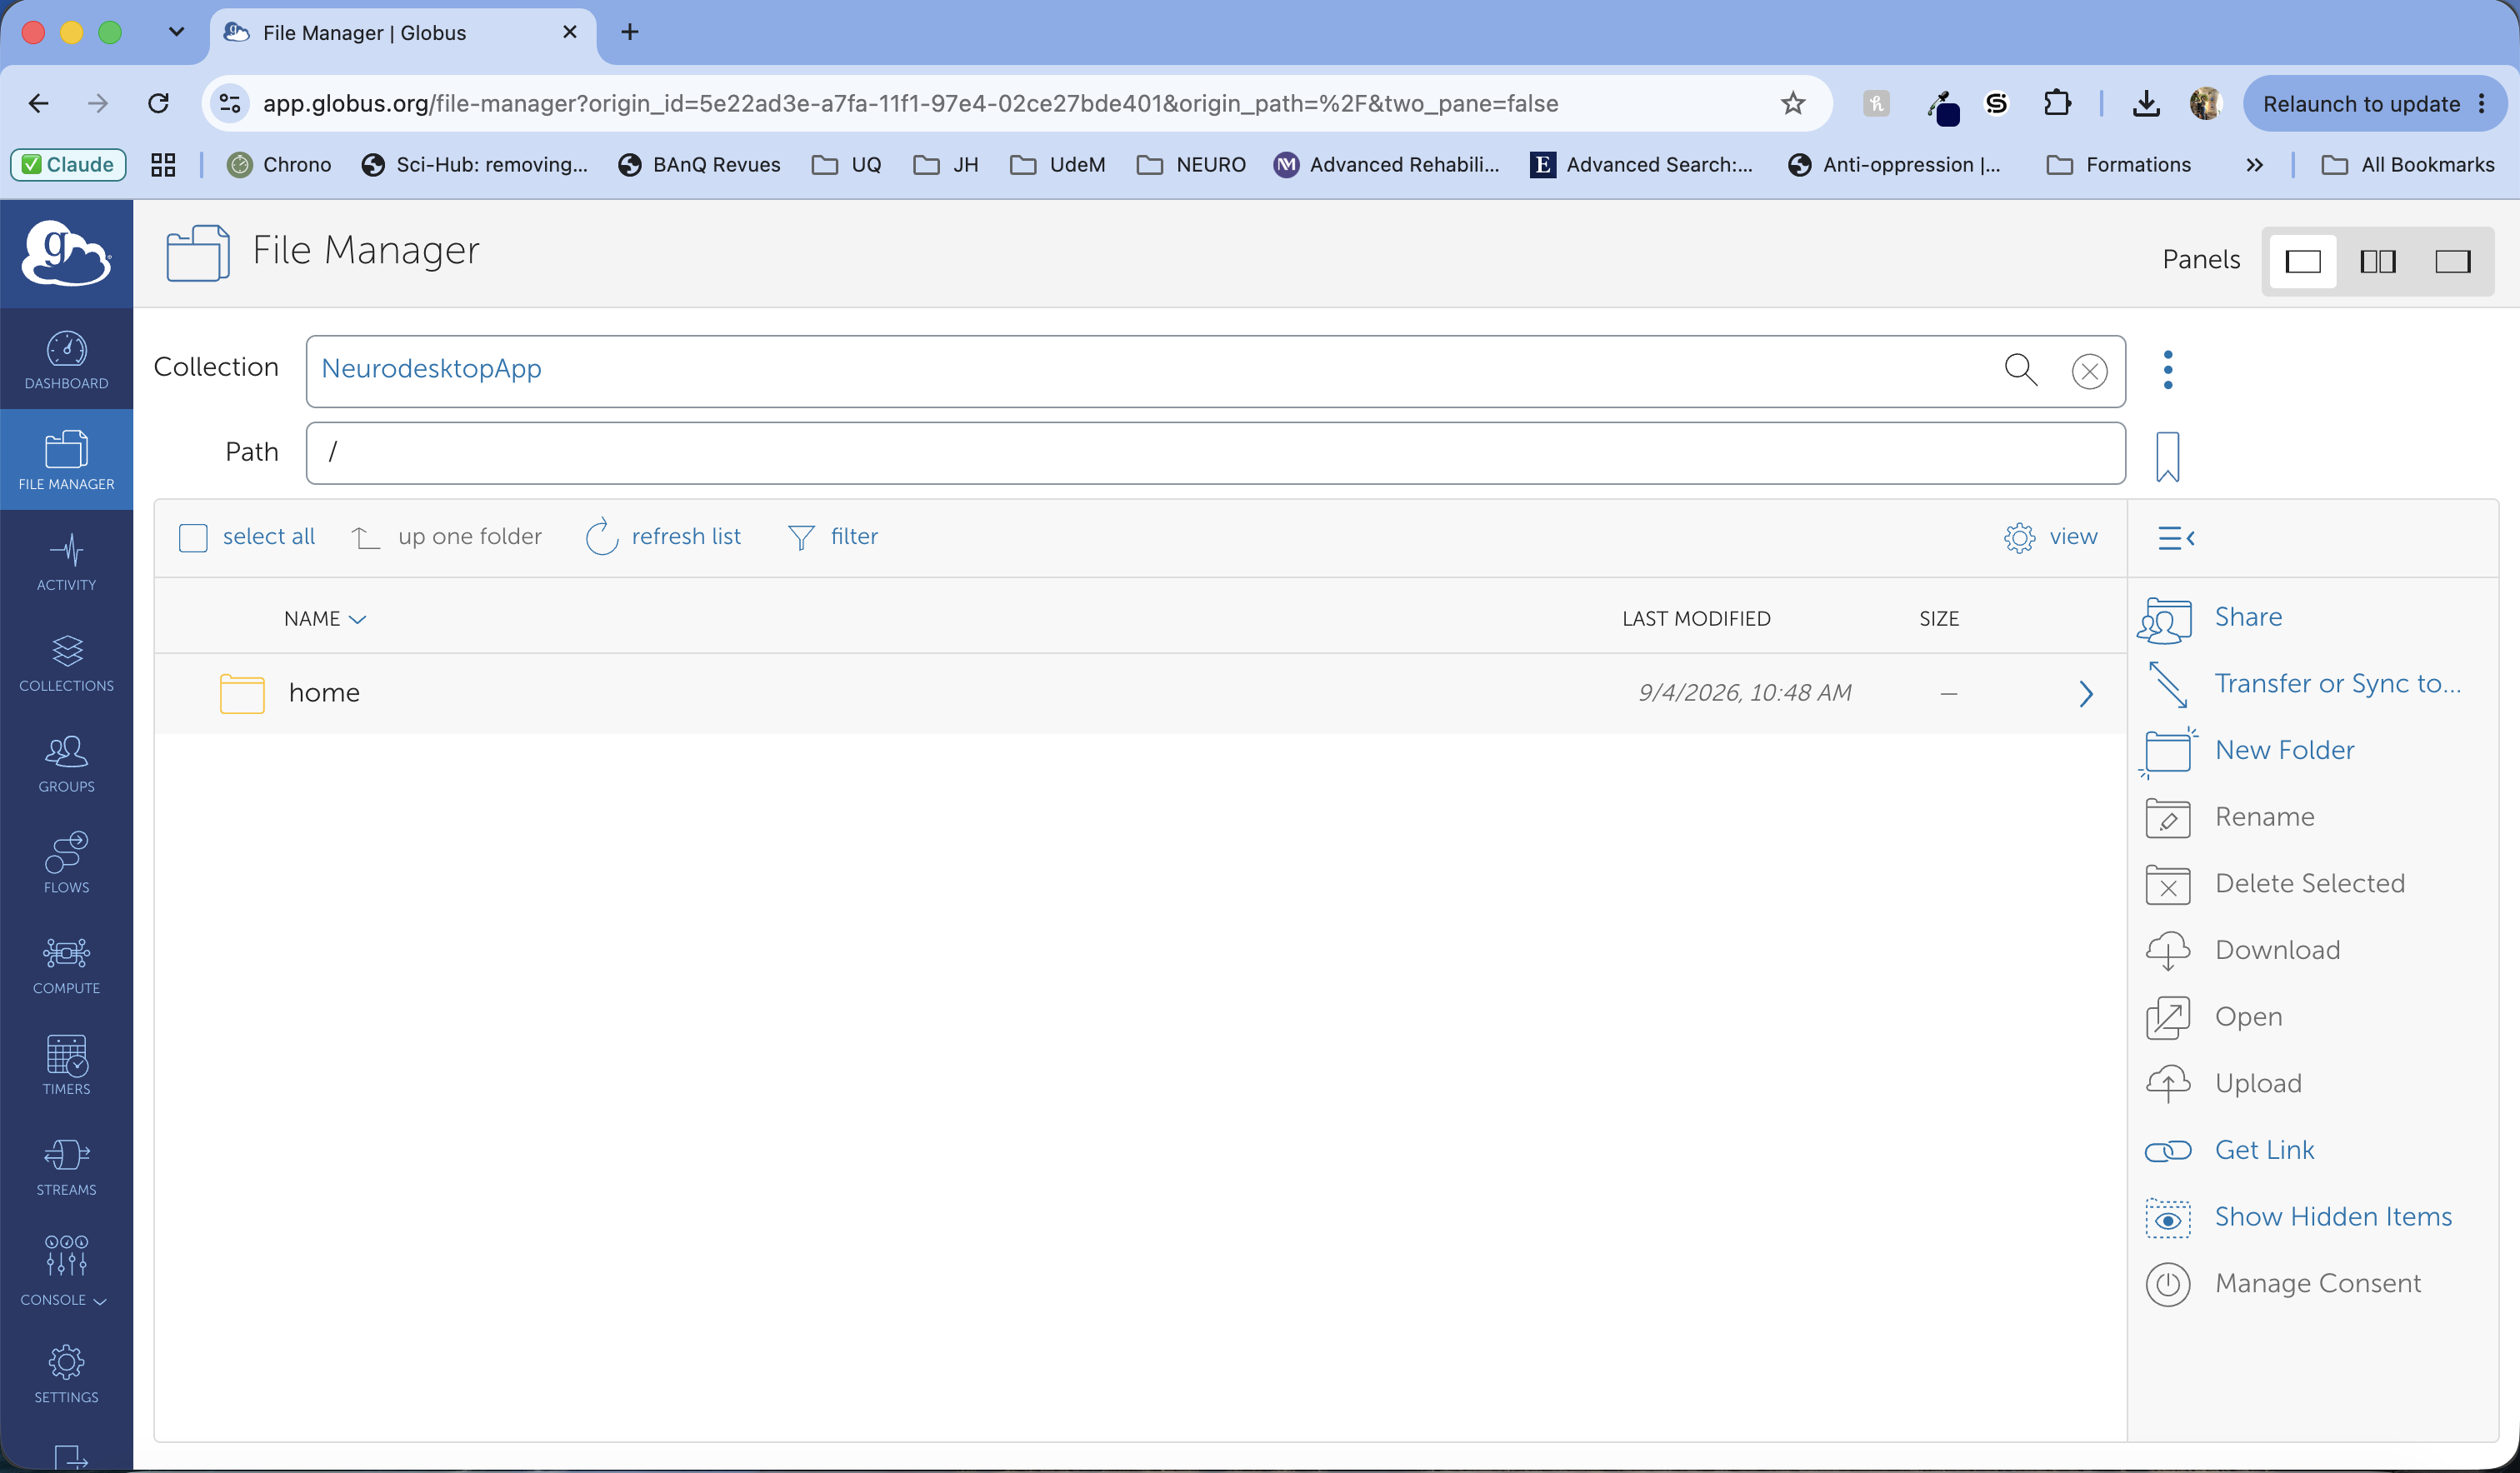
Open the Globus file manager and select the collection with the endpoint name you entered during setup. You can now browse the shared paths and transfer files between Neurodesktop and another Globus collection:
Mount volume using SSHFS
Section titled “Mount volume using SSHFS”It is theoretically possible to mount an SSH target inside Neurodesktop, but it’s not a very reliable way of mounting storage:
sudo mkdir /mnt/data_mountsudo chmod a+rwx /mnt/data_mountsshfs -o allow_root USER@TARGET_HOST:TARGET_PATH /mnt/data_mountA better option is to use scp and copy data from an SSH endpoint:
scp /neurodesk/myfile user@remoteserver:/data/An alternative is to mount the SSHFS target into a parent directory on your local machine or VM and then use the -v option in the docker run command to bind the parent directory of the SSHFS mount.
For example, on a local Linux machine or VM:
sshfs -o allow_root USER@TARGET_HOST:TARGET_PATH/MyData SOURCE_PATH/SSHFS_Mounts/MyDataThen add the following line to the docker run command when starting Neurodesktop (note the rshared flag):
-v /SSHFS_Mounts:/data:rshared \